Shadertoy Tutorial Part 4 - Multiple 2D Shapes and Mixing
Greetings, friends! In the past couple tutorials, we've learned how to draw 2D shapes to the canvas using Shadertoy. In this article, I'd like to discuss a better approach to drawing 2D shapes, so we can easily add multiple shapes to the canvas. We'll also learn how to change the background color independent from the shape colors.
The Mix Function
Before we continue, let's take a look at the mix function. This function will be especially useful to us as we render multiple 2D shapes to the scene.
The mix function linearly interpolates between two values. In other shader languages such as HLSL, this function is known as lerp instead.
Linear interpolation for the function, mix(x, y, a), is based on the following formula:
x * (1 - a) + y * a

x = first value
y = second value
a = value that linearly interpolates between x and y
Think of the third parameter, a, as a slider that lets you choose values between x and y.
You will see the mix function used heavily in shaders. It's a great way to create color gradients. Let's look at an example:
void mainImage( out vec4 fragColor, in vec2 fragCoord )
{
    vec2 uv = fragCoord/iResolution.xy; // <0, 1>

    float interpolatedValue = mix(0., 1., uv.x);
    vec3 col = vec3(interpolatedValue);

    // Output to screen
    fragColor = vec4(col,1.0);
}
In the above code, we are using the mix function to get an interpolated value per pixel on the screen across the x-axis. By using the same value across the red, green, and blue channels, we get a gradient that goes from black to white, with shades of gray in between.

We can also use the mix function along the y-axis:
float interpolatedValue = mix(0., 1., uv.y);

Using this knowledge, we can create a colored gradient in our pixel shader. Let's define a function specifically for setting the background color of the canvas.
vec3 getBackgroundColor(vec2 uv) {
    uv += 0.5; // remap uv from <-0.5,0.5> to <0,1>
    vec3 gradientStartColor = vec3(1., 0., 1.);
    vec3 gradientEndColor = vec3(0., 1., 1.);
    return mix(gradientStartColor, gradientEndColor, uv.y); // gradient goes from bottom to top
}

void mainImage( out vec4 fragColor, in vec2 fragCoord )
{
    vec2 uv = fragCoord/iResolution.xy; // <0, 1>
    uv -= 0.5; // <-0.5,0.5>
    uv.x *= iResolution.x/iResolution.y; // fix aspect ratio

    vec3 col = getBackgroundColor(uv);

    // Output to screen
    fragColor = vec4(col,1.0);
}
This will produce a cool gradient that goes between shades of purple and cyan.

When using the mix function on vectors, it will use the third parameter to interpolate each vector on a component basis. It will run through the interpolator function for the red component (or x-component) of the gradientStartColor vector and the red component of the gradientEndColor vector. The same tactic will be applied to the green (y-component) and blue (z-component) channels of each vector.
We added 0.5 to the value of uv because in most situations, we will be working with values of uv that range between a negative number and positive number. If we pass a negative value into the final fragColor, then it'll be clamped to zero. We shift the range away from negative values for the purpose of displaying color in the full range.
An Alternative Way to Draw 2D Shapes
In the previous tutorials, we learned how to use 2D SDFs to create 2D shapes such as circles and squares. However, the sdfCircle and sdfSquare functions were returning a color in the form of a vec3 vector.
Typically, SDFs return a float and not vec3 value. Remember, "SDF" is an acronym for "signed distance fields." Therefore, we expect them to return a distance of type float. In 3D SDFs, this is usually true, but in 2D SDFs, I find it's more useful to return either a one or zero depending on whether the pixel is inside the shape or outside the shape as we'll see later.
The distance is relative to some point, typically the center of the shape. If a circle's center is at the origin, (0, 0), then we know that any point on the edge of the circle is equal to the radius of the circle, hence the equation:
x^2 + y^2 = r^2

Or, when rearranged,
x^2 + y^2 - r^2 = 0

where x^2 + y^2 - r^2 = distance = d
If the distance is greater than zero, then we know that we are outside the circle. If the distance is less than zero, then we are inside the circle. If the distance is equal to zero exactly, then we're on the edge of the circle. This is where the "signed" part of the "signed distance field" comes into play. The distance can be negative or positive depending on whether the pixel coordinate is inside or outside the shape.
In Part 2 of this tutorial series, we drew a blue circle using the following code:
vec3 sdfCircle(vec2 uv, float r) {
  float x = uv.x;
  float y = uv.y;

  float d = length(vec2(x, y)) - r;

  return d > 0. ? vec3(1.) : vec3(0., 0., 1.);
  // draw background color if outside the shape
  // draw circle color if inside the shape
}

void mainImage( out vec4 fragColor, in vec2 fragCoord )
{
  vec2 uv = fragCoord/iResolution.xy; // <0,1>
  uv -= 0.5;
  uv.x *= iResolution.x/iResolution.y; // fix aspect ratio

  vec3 col = sdfCircle(uv, .2);

  // Output to screen
  fragColor = vec4(col,1.0);
}
The problem with this approach is that we're forced to draw a circle with the color, blue, and a background with the color, white.
We need to make the code a bit more abstract, so we can draw the background and shape colors independent of each other. This will allow us to draw multiple shapes to the scene and select any color we want for each shape and the background.
Let's look at an alternative way of drawing the blue circle:
float sdfCircle(vec2 uv, float r, vec2 offset) {
  float x = uv.x - offset.x;
  float y = uv.y - offset.y;

  return length(vec2(x, y)) - r;
}

vec3 drawScene(vec2 uv) {
  vec3 col = vec3(1);
  float circle = sdfCircle(uv, 0.1, vec2(0, 0));

  col = mix(vec3(0, 0, 1), col, step(0., circle));

  return col;
}

void mainImage( out vec4 fragColor, in vec2 fragCoord )
{
  vec2 uv = fragCoord/iResolution.xy; // <0, 1>
  uv -= 0.5; // <-0.5,0.5>
  uv.x *= iResolution.x/iResolution.y; // fix aspect ratio

  vec3 col = drawScene(uv);

  // Output to screen
  fragColor = vec4(col,1.0);
}
In the code above, we are now abstracting out a few things. We have a drawScene function that will be responsible for rendering the scene, and the sdfCircle now returns a float that represents the "signed distance" between a pixel on the screen and a point on the circle.
We learned about the step function in Part 2. It returns a value of one or zero depending on the value of the second parameter. In fact, the following are equivalent:
float result = step(0., circle);
float result = circle > 0. ? 1. : 0.;
If the "signed distance" value is greater than zero, then that means, the point is inside the circle. If the value is less than or equal to zero, then the point is outside or on the edge of the circle.
Inside the drawScene function, we are using the mix function to blend the white background color with the color, blue. The value of circle will determine if the pixel is white (the background) or blue (the circle). In this sense, we can use the mix function as a "toggle" that will switch between the shape color or background color depending on the value of the third parameter.

Using an SDF in this way basically lets us draw the shape only if the pixel is at a coordinate that lies within the shape. Otherwise, it should draw the color that was there before.
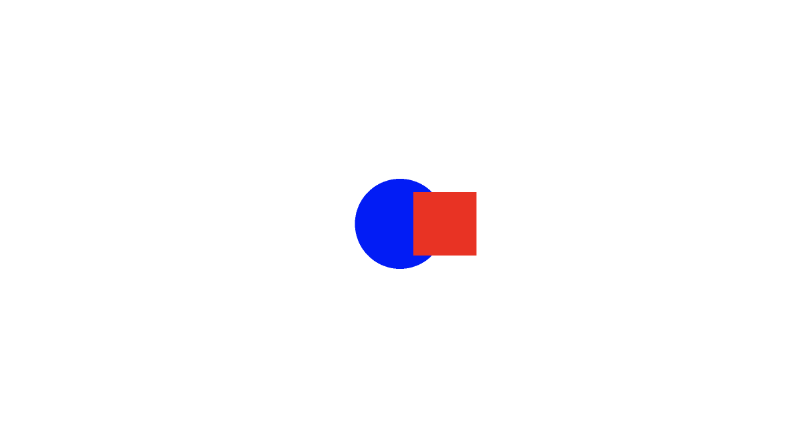
Let's add a square that is offset from the center a bit.
float sdfCircle(vec2 uv, float r, vec2 offset) {
  float x = uv.x - offset.x;
  float y = uv.y - offset.y;

  return length(vec2(x, y)) - r;
}

float sdfSquare(vec2 uv, float size, vec2 offset) {
  float x = uv.x - offset.x;
  float y = uv.y - offset.y;

  return max(abs(x), abs(y)) - size;
}

vec3 drawScene(vec2 uv) {
  vec3 col = vec3(1);
  float circle = sdfCircle(uv, 0.1, vec2(0, 0));
  float square = sdfSquare(uv, 0.07, vec2(0.1, 0));

  col = mix(vec3(0, 0, 1), col, step(0., circle));
  col = mix(vec3(1, 0, 0), col, step(0., square));

  return col;
}

void mainImage( out vec4 fragColor, in vec2 fragCoord )
{
  vec2 uv = fragCoord/iResolution.xy; // <0, 1>
  uv -= 0.5; // <-0.5,0.5>
  uv.x *= iResolution.x/iResolution.y; // fix aspect ratio

  vec3 col = drawScene(uv);

  // Output to screen
  fragColor = vec4(col,1.0);
}
Using the mix function with this approach lets us easily render multiple 2D shapes to the scene!
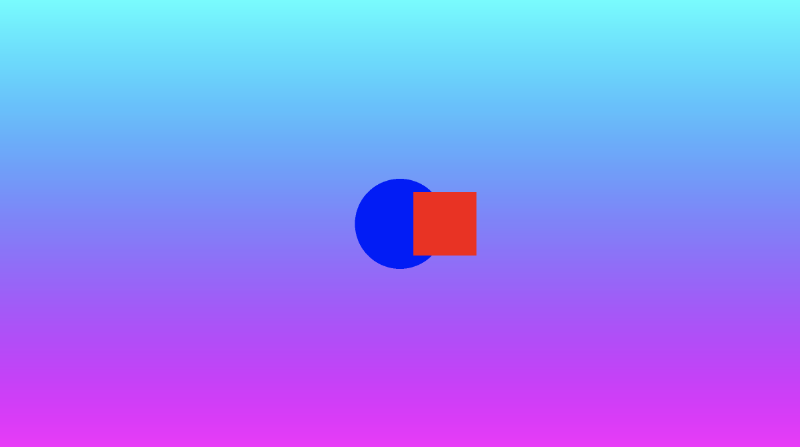
Custom Background and Multiple 2D Shapes
With the knowledge we've learned, we can easily customize our background while leaving the color of our shapes intact. Let's add a function that returns a gradient color for the background and use it at the top of the drawScene function.
vec3 getBackgroundColor(vec2 uv) {
    uv += 0.5; // remap uv from <-0.5,0.5> to <0,1>
    vec3 gradientStartColor = vec3(1., 0., 1.);
    vec3 gradientEndColor = vec3(0., 1., 1.);
    return mix(gradientStartColor, gradientEndColor, uv.y); // gradient goes from bottom to top
}

float sdfCircle(vec2 uv, float r, vec2 offset) {
  float x = uv.x - offset.x;
  float y = uv.y - offset.y;

  return length(vec2(x, y)) - r;
}

float sdfSquare(vec2 uv, float size, vec2 offset) {
  float x = uv.x - offset.x;
  float y = uv.y - offset.y;
  return max(abs(x), abs(y)) - size;
}

vec3 drawScene(vec2 uv) {
  vec3 col = getBackgroundColor(uv);
  float circle = sdfCircle(uv, 0.1, vec2(0, 0));
  float square = sdfSquare(uv, 0.07, vec2(0.1, 0));

  col = mix(vec3(0, 0, 1), col, step(0., circle));
  col = mix(vec3(1, 0, 0), col, step(0., square));

  return col;
}

void mainImage( out vec4 fragColor, in vec2 fragCoord )
{
  vec2 uv = fragCoord/iResolution.xy; // <0, 1>
  uv -= 0.5; // <-0.5,0.5>
  uv.x *= iResolution.x/iResolution.y; // fix aspect ratio

  vec3 col = drawScene(uv);

  // Output to screen
  fragColor = vec4(col,1.0);
}
Simply stunning! 🤩
Would this piece of abstract digital art make a lot of money as a non-fungible token 🤔. Probably not, but one can hope 😅.
Conclusion
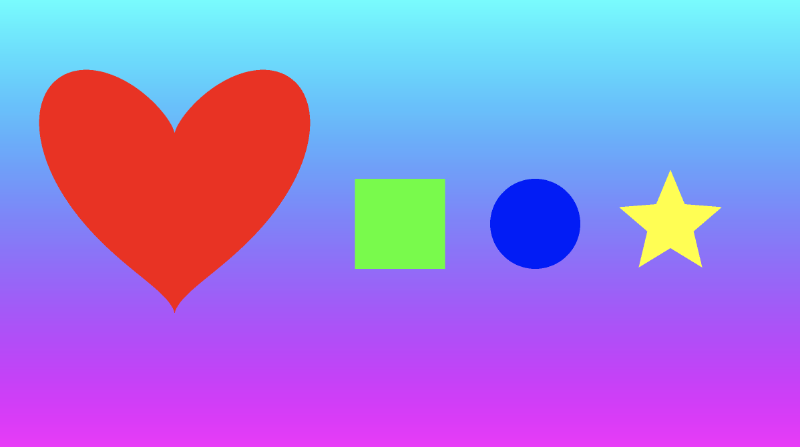
In this lesson, we created a beautiful piece of digital art. We learned how to use the mix function to create a color gradient and how to use it to render shapes on top of each other or on top of a background layer. In the next lesson, I'll talk about other 2D shapes we can draw such as hearts and stars.