Shadertoy Tutorial Part 15 - Channels, Textures, and Buffers
Greetings, friends! Welcome to Part 15 of my Shadertoy tutorial series! In this tutorial, I'll discuss how to use channels and buffers in Shadertoy, so we can use textures and create multi-pass shaders.
Channels
Shadertoy uses a concept known as channels to access different types of data. At the bottom of the Shadertoy user interface, you will see four black boxes: iChannel0, iChannel1, iChannel2, and iChannel3.
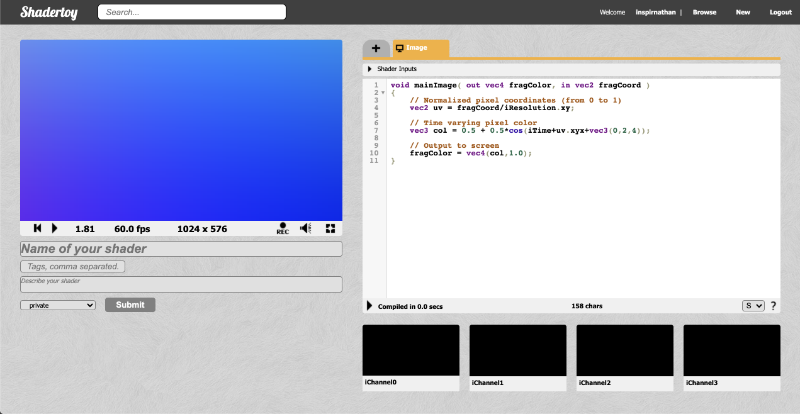
If you click any of the channels, a popup will appear. You can select from a variety of interactive elements, textures, cubemaps, volumes, videos, and music.
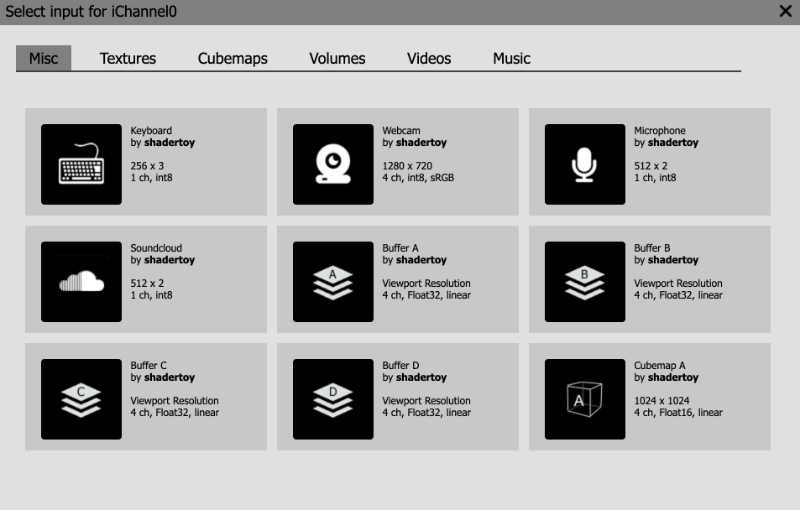
In the "Misc" tab, you can select from interactive elements such as a keyboard, a webcam, a microphone, or even play music from SoundCloud. The buffers, Buffer A, Buffer B, Buffer C, and Buffer D, let you create "multi-pass" shaders. Think of them as an extra shader you can add to your shader pipeline. The "Cubemap A" input is a special type of shader program that lets you create your own cubemap. You can then pass that cubemap to a buffer or to your main "Image" program. We'll talk about cubemaps in the next tutorial.
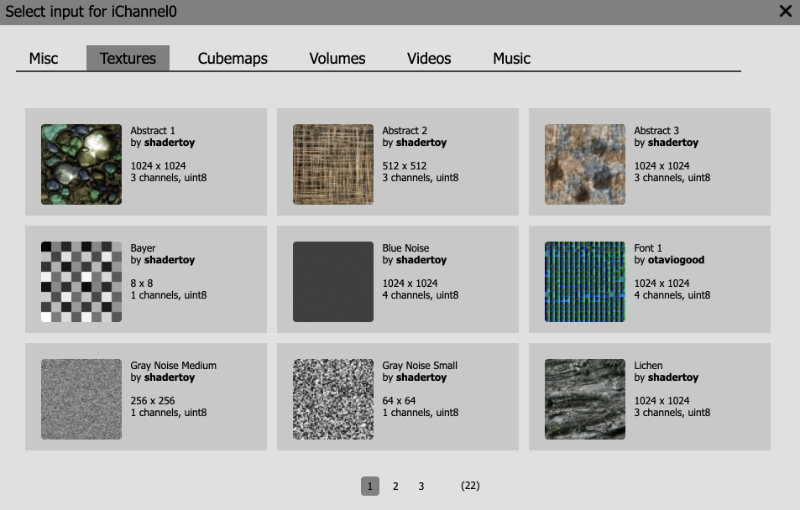
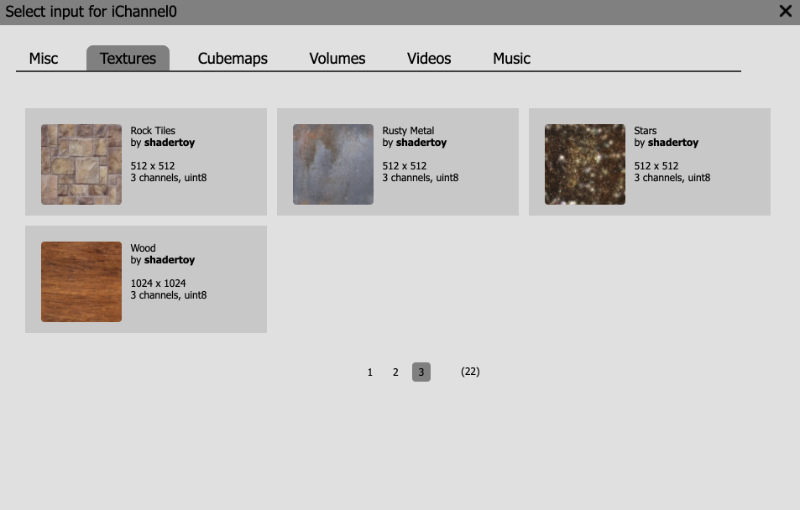
The next tab is the "Textures" tab. You will find three pages worth of 2D textures to choose from. Think of 2D textures as images we can pull pixel values from. As of the time of this writing, you can only use textures Shadertoy provides for you and can't import images from outside of Shadertoy. However, there are ways to circumvent this locally using details found in this shader.
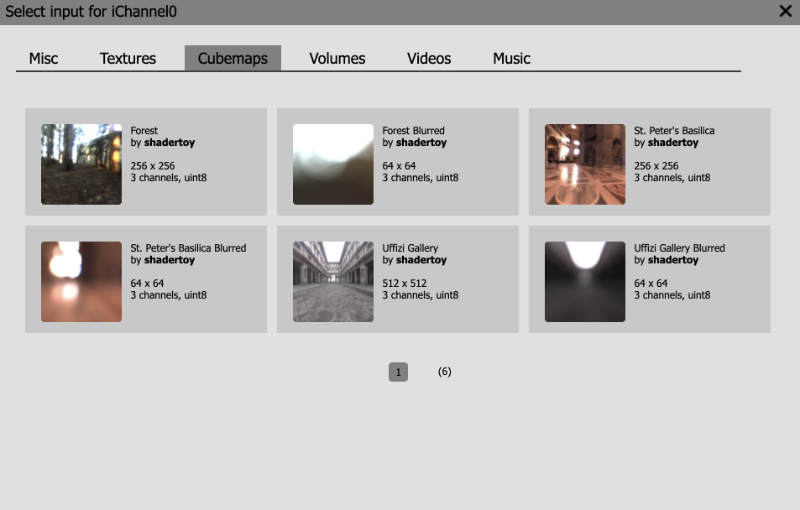
The "Cubemaps" tab contains a selection of cubemaps you can choose from. We will talk about them more in the next tutorial. Cubemaps are commonly used in game engines such as Unity for rendering a 3D world around you.
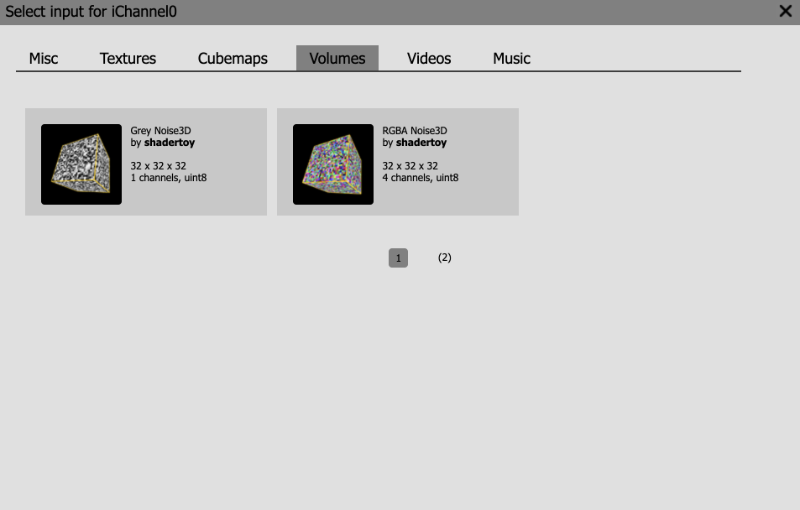
The "Volumes" tab contains 3D textures. Typical 2D textures use UV coordinates to access data along the x-axis (U value) and y-axis (V value). In 3D textures, you use UVW coordinates where the W value is for the z-axis. You can think of 3D textures as a cube where each pixel on the cube represents data we can pull from. It's like pulling data from a three-dimensional array.
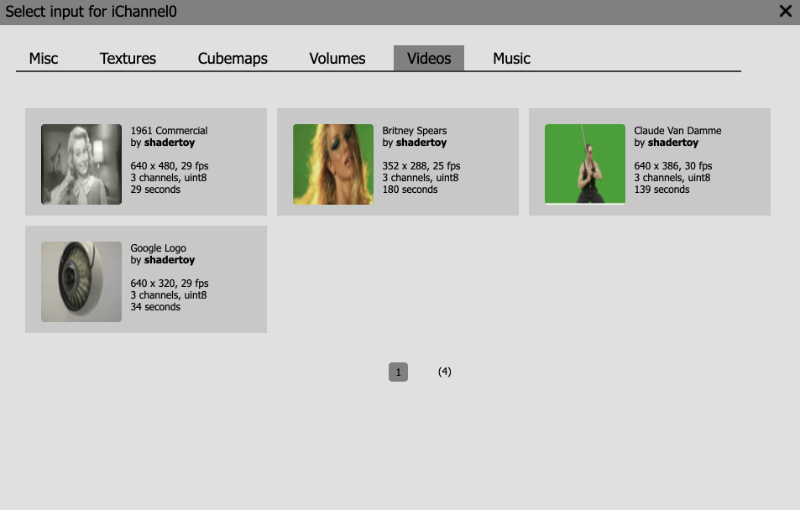
The "Videos" tab contains 2D textures (or images) that change with time. That is, they play videos in the Shadertoy canvas. People use videos on Shadertoy to experiment with postprocessing effects or image effects that rely on data from the previous frame. The "Britney Spears" and "Claude Van Damme" videos are great for testing out green screen effects (aka Chroma key compositing).
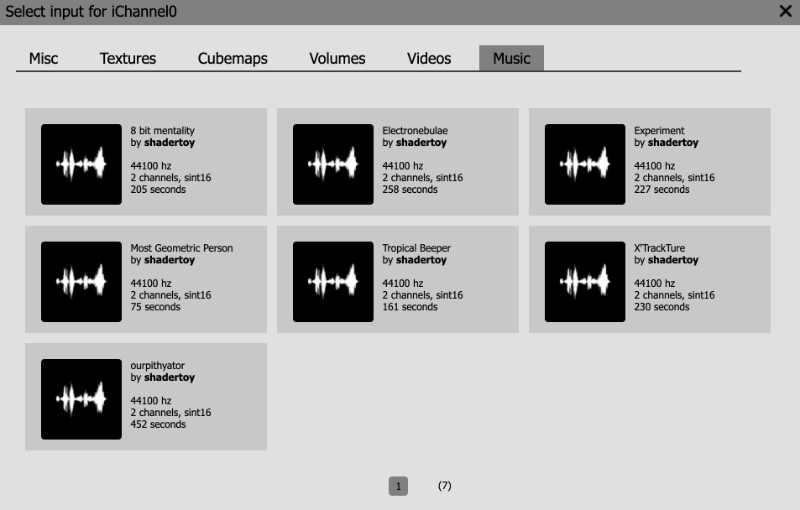
Finally, the "Music" tab lets you play from a range of songs that Shadertoy provides for you. The music will play automatically when a user visits your Shader if you have chosen a song from this tab in one of your channels.
Using Textures
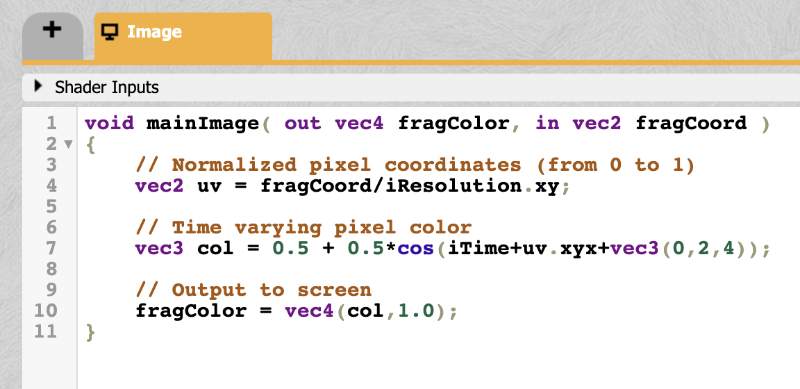
Using textures is very simple in Shadertoy. Open a new shader and replace the code with the following contents:
void mainImage( out vec4 fragColor, in vec2 fragCoord )
{
  vec2 uv = fragCoord/iResolution.xy; // Normalized pixel coordinates (from 0 to 1)

  vec4 col = texture(iChannel0, uv);

  fragColor = vec4(col); // Output to screen
}
Then, click on the iChannel0 box. When the popup appears, go to the "Textures" tab. We will be choosing the "Abstract 1" texture, but let's inspect some details displayed in the popup menu.
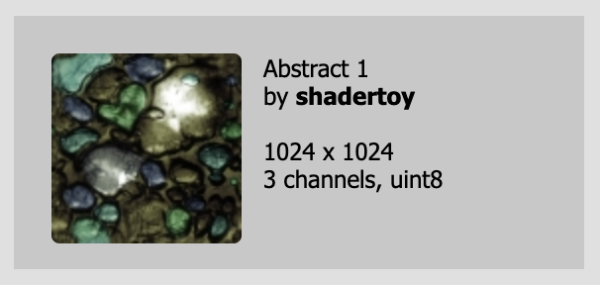
It says this texture has a resolution of 1024x1024 pixels, which implies this image is best viewed in a square-like or proportional canvas. It also has 3 channels (red, green, blue) which are each of type uint8, an unsigned integer of 8 bits.
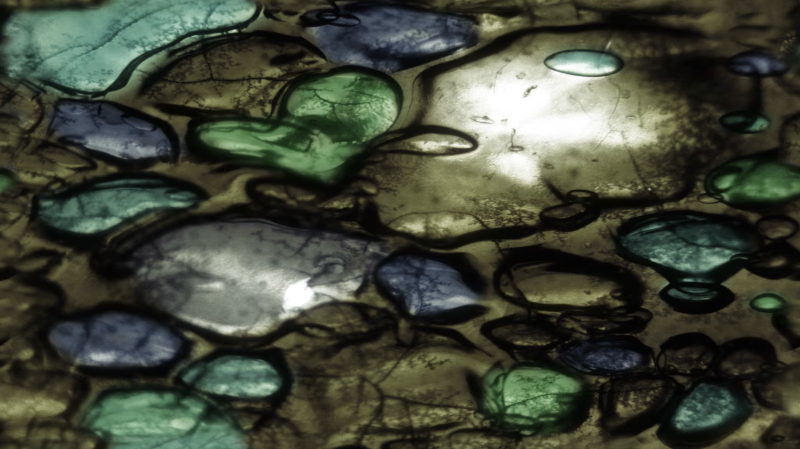
Go ahead and click on "Abstract 1" to load this texture into iChannel0. Then, run your shader program. You should see the texture appear in the Shadertoy canvas.
Let's analyze the code in our shader program.
void mainImage( out vec4 fragColor, in vec2 fragCoord )
{
  vec2 uv = fragCoord/iResolution.xy; // Normalized pixel coordinates (from 0 to 1)

  vec4 col = texture(iChannel0, uv);

  fragColor = vec4(col); // Output to screen
}
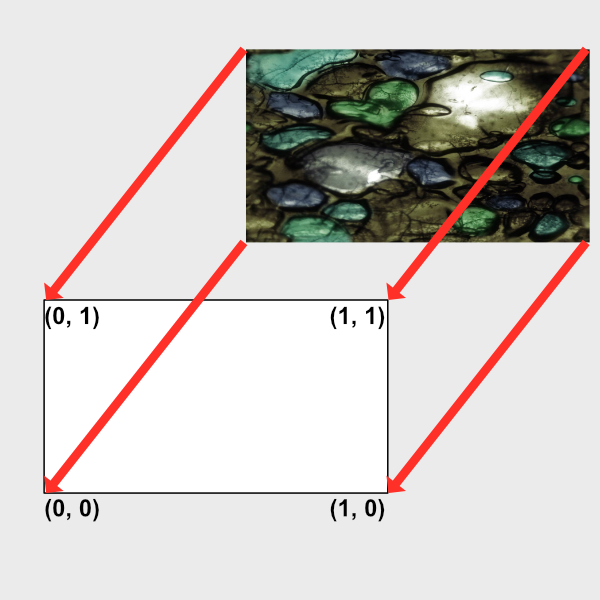
The UV coordinates go between zero and one across the x-axis and y-axis. Remember, the point (0, 0) starts at the bottom-left corner of the canvas. The texture function retrieves what are known as "texels" from a texture using iChannel0 and the uv coordinates.
A texel is value at a particular coordinate on the texture. For 2D textures such as images, a texel is a pixel value. We sample 2D textures assuming the UV coordinates go between zero and one on the image. We can then "UV map" the texture onto our entire Shadertoy canvas.
For 3D textures, you can think of a texel as a pixel value at a 3D coordinate. You typically won't see 3D textures used that often unless you're dealing with noise generation or volumetric ray marching.
You may be curious on what kind of type iChannel0 is when we pass it as a parameter to the texture function. Shadertoy takes care of setting up a sampler for you. A sampler is a way to bind texture units to a shader. The type of sampler will change depending on what kind of resource you load into one of the four channels (iChannel0, iChannel1, iChannel2, iChannel3).
In our case, we're loading a 2D texture into iChannel0. Therefore, iChannel0 will have the type, sampler2D. You can see what other sampler types are available on the OpenGL wiki page.
Suppose you wanted to make a function that let you pass in one of the channels. You can do this through the following code:
vec3 get2DTexture( sampler2D sam, vec2 uv ) {
  return texture(sam, uv).rgb;
}

void mainImage( out vec4 fragColor, in vec2 fragCoord )
{
  vec2 uv = fragCoord/iResolution.xy; // Normalized pixel coordinates (from 0 to 1)

  vec3 col = vec3(0.);

  col = get2DTexture(iChannel0, uv);
  col += get2DTexture(iChannel1, uv);

  fragColor = vec4(col,1.0); // Output to screen
}
If you click on the iChannel1 box, select the "Abstract 3" texture, and run your code, you should see two images blended together.
The get2DTexture function we created accepts a sampler2D type as its first parameter. When you use a 2D texture in a channel, Shadertoy automatically returns a sampler2D type of data for you.
If you want to play a video in the Shadertoy canvas, you can follow the same steps as for the 2D texture. Just choose a video inside iChannel0, and you should see the video start to play automatically.
Channel Settings
Alright, let's now look into some channel settings we can change. First, paste the following code into your shader:
void mainImage( out vec4 fragColor, in vec2 fragCoord )
{
  vec2 uv = fragCoord/iResolution.xy; // Normalized pixel coordinates (from 0 to 1)

  vec4 col = texture(iChannel0, uv);

  fragColor = vec4(col); // Output to screen
}
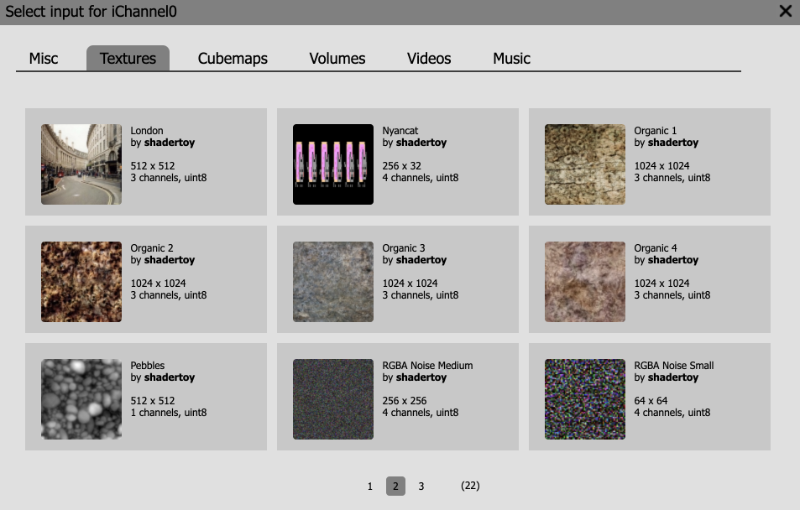
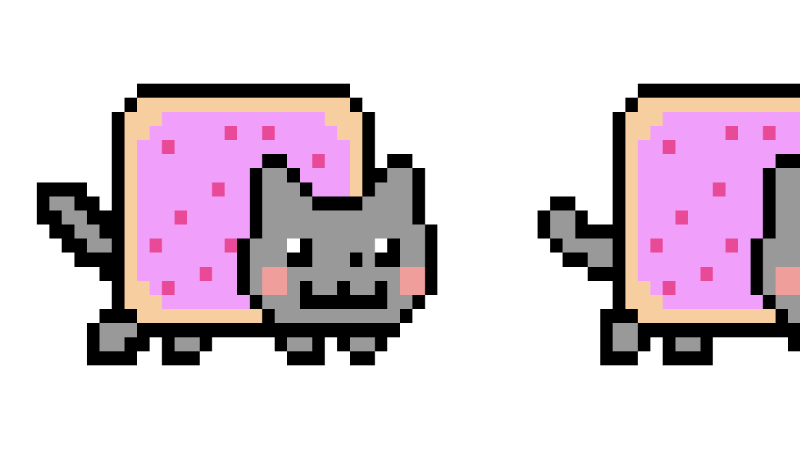
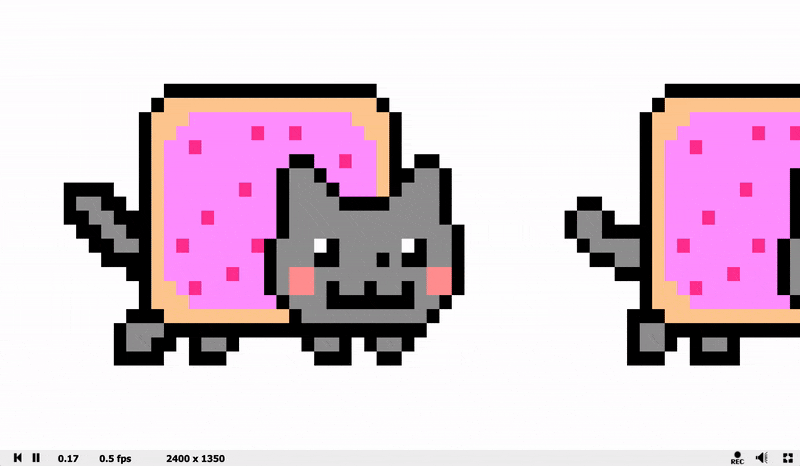
Then, we're going to use a new texture. Click on the iChannel0 box, go to the "Textures" tab, go to page 2, and you should see a "Nyancat" texture.
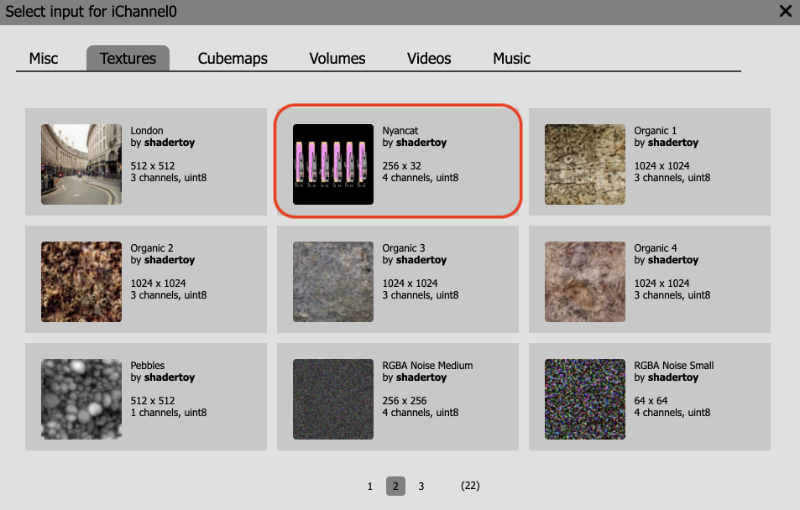
The "Nyancat" texture is a 256x32 image with 4 channels (red, green, blue, and alpha). Click on this texture, so it shows up in iChannel0.

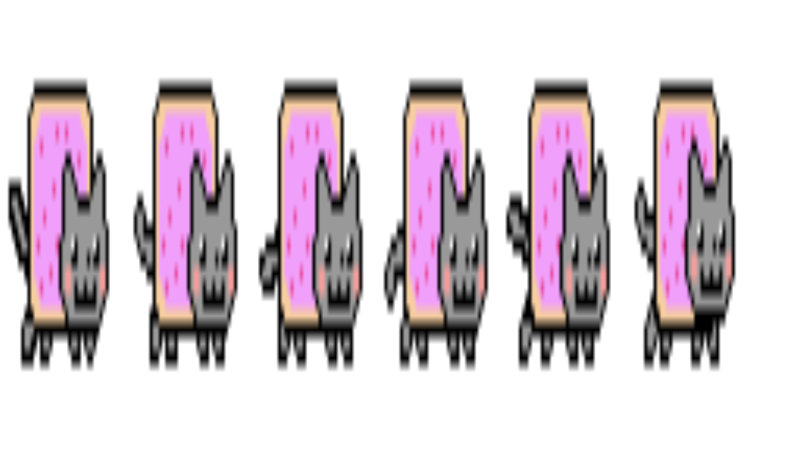
When you run the code, you should see Nyan Cats appear, but they appear blurry.
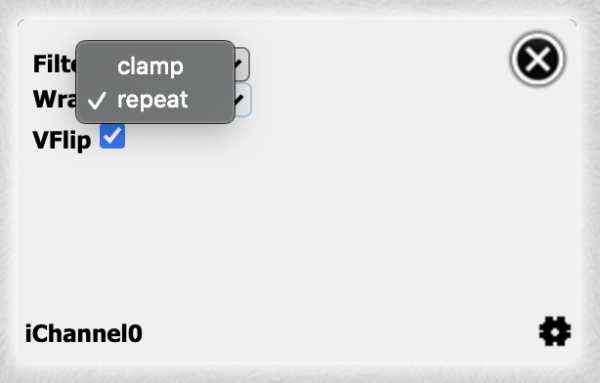
To fix this, we need to adjust the channel settings by clicking the little gear icon on the bottom right corner of the channel box.
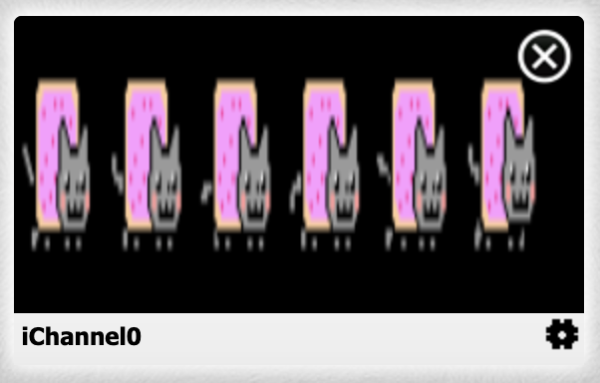
This will open up a menu with three settings: Filter, Wrap, and VFlip.
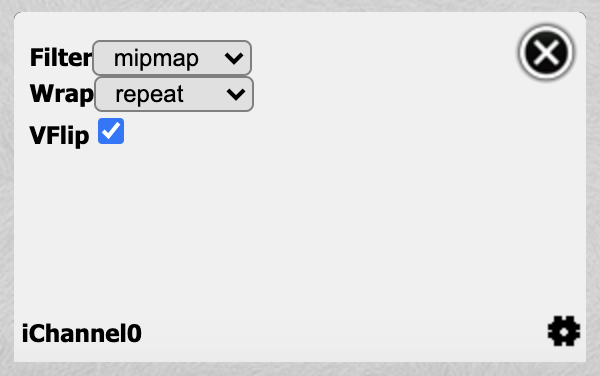
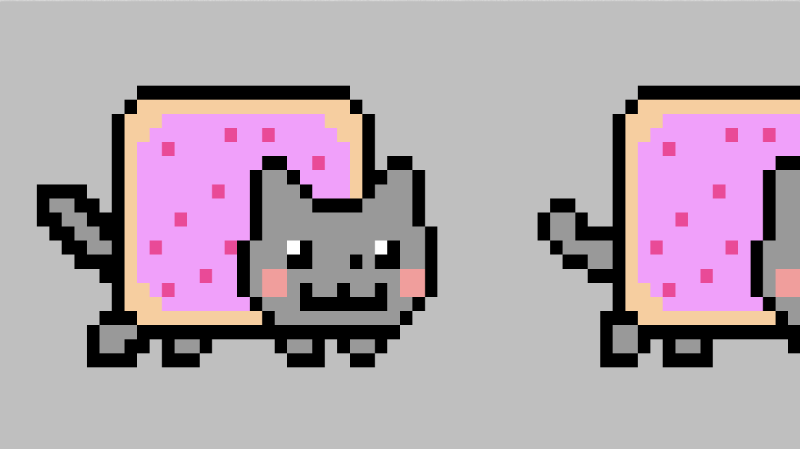
The Filter option lets you change the type of algorithm used to filter the texture. The dimensions of the texture and the Shadertoy canvas won't always match, so a filter is used to sample the texture. By default, the Filter option is set to "mipmap." Click on the dropdown menu and choose "nearest" to use "nearest-neighbor interpolation." This type of filter is useful for when you have textures or images that are pixelated, and you want to keep that pixelated look.
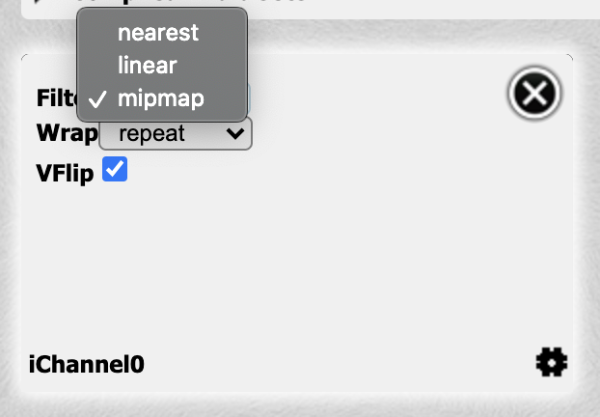
When you change the filter to "nearest," you should see the Nyan Cats look super clear and crisp.

The Nyan Cats look a bit squished though. Let's fix that by scaling the x-axis by 0.25.
void mainImage( out vec4 fragColor, in vec2 fragCoord )
{
  vec2 uv = fragCoord/iResolution.xy; // Normalized pixel coordinates (from 0 to 1)

  uv.x *= 0.25;

  vec4 col = texture(iChannel0, uv);

  fragColor = vec4(col); // Output to screen
}
When you run the code, the Nyan Cats won't look squished anymore.
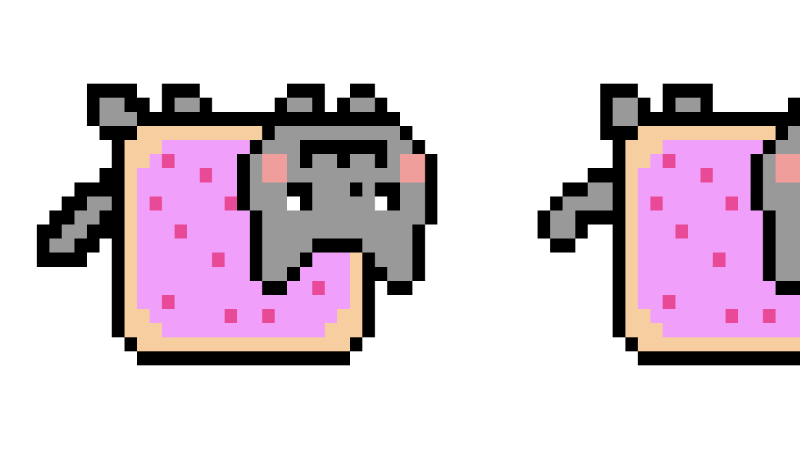
You can use the VFlip option to flip the texture upside down or vertically. Uncheck the checkbox next to VFlip in the channel settings to see the Nyan Cats flip upside down.
Go back and check the VFlip option to return the Nyan Cats to normal. You can make the Nyan Cats move by subtracting an offset from uv.x and using iTime to animate the scene.
void mainImage( out vec4 fragColor, in vec2 fragCoord )
{
  vec2 uv = fragCoord/iResolution.xy; // Normalized pixel coordinates (from 0 to 1)

  uv.x *= 0.25;

  uv.x -= iTime * 0.05;

  vec4 col = texture(iChannel0, uv);

  fragColor = vec4(col); // Output to screen
}
By default, the Wrap mode is set to "repeat." This means that when the UV coordinates are outside the boundary of zero and one, it'll start sampling from the texture and repeat between zero and one. Since we're making uv.x smaller and smaller, we definitely go outside the boundary of zero, but the sampler is smart enough to figure out how to adapt.
If you don't want this repeating behavior, you can set the Wrap mode to "clamp" instead.
If you reset the time back to zero, then you'll see that after the UV coordinates go outside the boundary of zero or one, we don't see the Nyan Cats anymore.

Since the "Nyancat" texture provides four channels and therefore an alpha channel, we can easily swap out the background. Make sure the timer is set back to zero and run the following code:
void mainImage( out vec4 fragColor, in vec2 fragCoord )
{
  vec2 uv = fragCoord/iResolution.xy; // Normalized pixel coordinates (from 0 to 1)

  vec4 col = vec4(0.75);

  uv.x *= 0.25;
  uv.x -= iTime * 0.05;

  vec4 texCol = texture(iChannel0, uv);

  col = mix(col, texCol, texCol.a);

  fragColor = vec4(col); // Output to screen
}
The "Nyancat" texture has an alpha value of zero everwhere except for where the Nyan Cats are. This lets us set a background color behind them.
Keep in mind that most textures are only three channels. Some textures only have one channel such as the "Bayer" texture. This means that the red channel will contain data, but the other three channels will not, which is why you will likely see red when you use it. Some textures are used for creating noise or displacing shapes a particular way. You can even use textures as height maps to shape the height of terrains based on the color values stored inside the texture. Textures serve a variety of purposes.
Buffers
Shadertoy provides the support of buffers. You can run completely different shaders in each buffer. Each shader will have its own final fragColor that can be passed to another buffer or the main "Image" shader we've been working in.
There are four buffers: Buffer A, Buffer B, Buffer C, and Buffer D. Each buffer can hold its own four channels. To access a buffer, we use one of the four channels. Let's practice with buffers to see how to use them.
Above your code, near the top of the Shadertoy user interface, you should see a tab labelled "Image." The "Image" tab represents the main shader we've been using in the previous tutorials. To add a buffer, simply click on the plus sign (+) to the left of the Image tab.
From there, you'll see a dropdown of items to choose from: Common, Sound, Buffer A, Buffer B, Buffer C, Buffer D, Cubemap A.
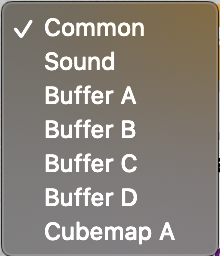
The Common option is used to share code between the "Image" shader, all buffers, and other shaders including Sound and Cubemap A. The Sound options lets you create a shader that generates sound. The Cubemap A option lets you generate your own cubemap. For this tutorial, I'll go over the buffers, which are normal shaders that return a color of type vec4 (red, green, blue, alpha).
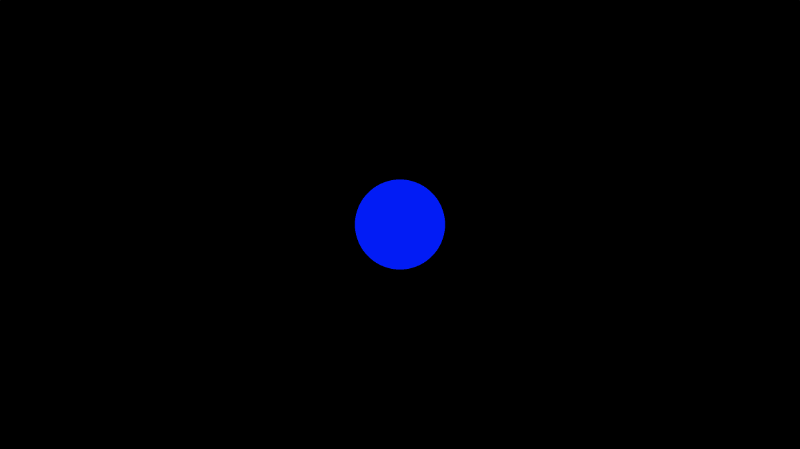
Go ahead and select Buffer A. You should see default code provided for you.
void mainImage( out vec4 fragColor, in vec2 fragCoord )
{
  fragColor = vec4(0.0,0.0,1.0,1.0);
}
Looks like this code simply returns the color, blue, for each pixel. Next, let's go back to the "Image" tab. Click on iChannel0, go to the "Misc" tab, and select Buffer A. You should now be using Buffer A for iChannel0. Inside the "Image" shader, paste the following code.
void mainImage( out vec4 fragColor, in vec2 fragCoord )
{
  vec2 uv = fragCoord/iResolution.xy;

  vec3 col = texture(iChannel0, uv).rgb;

  col += vec3(1, 0, 0);

  // Output to screen
  fragColor = vec4(col, 1.0);
}
When you run the code, you should see the entire canvas turn purple. This is because we're taking the color values from Buffer A, passing it into the Image shader, adding red to the blue color we got from Buffer A, and outputting the result to the screen.
Essentially, buffers give you more space to work with. You can create an entire shader in Buffer A, pass the result to another buffer to do more processing on it, and then pass the result to the Image shader to output the final result. Think of it as a pipeline where you keep passing the output of one shader to the next. This is why shaders that leverage buffers or additional shaders are often called multi-pass shaders.
Using the Keyboard
You may have seen shaders on Shadertoy that let users control the scene with a keyboard. I have written a shader that demonstrates how to move objects using a keyboard and uses a buffer to store the results of each key press. If you go to this shader, you should see a multi-pass shader with a buffer, Buffer A, and the main "Image" shader.
Inside Buffer A, you should see the following code:
// Numbers are based on JavaScript key codes: https://keycode.info/
const int KEY_LEFT  = 37;
const int KEY_UP    = 38;
const int KEY_RIGHT = 39;
const int KEY_DOWN  = 40;

vec2 handleKeyboard(vec2 offset) {
    float velocity = 1. / 100.; // This will cause offset to change by 0.01 each time an arrow key is pressed

    // texelFetch(iChannel1, ivec2(KEY, 0), 0).x will return a value of one if key is pressed, zero if not pressed
    vec2 left = texelFetch(iChannel1, ivec2(KEY_LEFT, 0), 0).x * vec2(-1, 0);
    vec2 up = texelFetch(iChannel1, ivec2(KEY_UP,0), 0).x * vec2(0, 1);
    vec2 right = texelFetch(iChannel1, ivec2(KEY_RIGHT, 0), 0).x * vec2(1, 0);
    vec2 down = texelFetch(iChannel1, ivec2(KEY_DOWN, 0), 0).x * vec2(0, -1);

    offset += (left + up + right + down) * velocity;

    return offset;
}

void mainImage( out vec4 fragColor, in vec2 fragCoord )
{
    // Return the offset value from the last frame (zero if it's first frame)
    vec2 offset = texelFetch( iChannel0, ivec2(0, 0), 0).xy;

    // Pass in the offset of the last frame and return a new offset based on keyboard input
    offset = handleKeyboard(offset);

    // Store offset in the XY values of every pixel value and pass this data to the "Image" shader and the next frame of Buffer A
    fragColor = vec4(offset, 0, 0);
}
Inside the "Image" shader, you should see the following code:
float sdfCircle(vec2 uv, float r, vec2 offset) {
    float x = uv.x - offset.x;
    float y = uv.y - offset.y;

    float d = length(vec2(x, y)) - r;

    return step(0., -d);
}

vec3 drawScene(vec2 uv) {
    vec3 col = vec3(0);

    // Fetch the offset from the XY part of the pixel values returned by Buffer A
    vec2 offset = texelFetch( iChannel0, ivec2(0,0), 0 ).xy;

    float blueCircle = sdfCircle(uv, 0.1, offset);

    col = mix(col, vec3(0, 0, 1), blueCircle);

    return col;
}

void mainImage( out vec4 fragColor, in vec2 fragCoord )
{
    vec2 uv = fragCoord/iResolution.xy; // <0, 1>
    uv -= 0.5; // <-0.5,0.5>
    uv.x *= iResolution.x/iResolution.y; // fix aspect ratio

    vec3 col = drawScene(uv);

    // Output to screen
    fragColor = vec4(col,1.0);
}
My multi-pass shader draws a circle to the canvas and lets you move it around using the keyboard. What's actually happening is that we're getting a value of one or zero from a key press and using that value to control the circle's offset value.
If you look inside Buffer A, you'll notice that I'm using Buffer A in iChannel0 from within Buffer A. How is that possible? When you use Buffer A within the Buffer A shader, you will get access to the fragColor value from the last frame that was run.
There's no recursion going on. You can't use recursion in GLSL as far as I'm aware of. Therefore, everything must be coded in an iterative approach. However, that doesn't stop us from using buffers on a frame by frame basis.
The texelFetch function performs a lookup of a single texel value within a texture. A keyboard isn't a texture though, so how does that work? Shadertoy essentially glued things together in a way that lets us access the browser's keyboard events from within a shader as if it were a texture. We can access key presses by using texelFetch to check if a key was pressed.
We get back a zero or one depending on whether a key isn't pressed or is pressed, respectively. We can then multiply this value by a velocity to adjust the circle's offset. The offset value will be passed to the next frame of Buffer A. Then, it'll get passed to the "Image" shader.
If the scene is running at 60 frames per second (fps), then that means one frame is drawn every 1/60 of a second. During one pass of our multi-pass shader, we'll pull from the last frame's Buffer A value, pass that into the current frame's Buffer A shader, pass that result to the "Image" shader, and then draw the pixel to the canvas. This cycle will repeat every frame or 60 times a second.
Other interactive elements such as our computer's microphone can be accessed like textures as well. Please read the resources below to see examples created by Inigo Quilez on how to use various interactive elements in Shadertoy.
Conclusion
Textures are a very important concept in computer graphics and game development. GLSL and other shader languages provide functions for accessing texture data. Shadertoy takes care of a lot of the hard work for you, so you can quickly access textures or interactive elements via channels. You can use textures to store color values but then use those colors to represent different types of data such as height, displacement, depth, or whatever else you can think of.
Please see the resources below to learn how to use various interactive elements in Shadertoy.