HTML5 Canvas API Tutorial Part 1 - Intro
Greetings, friends! Today, we begin an amazing journey to understanding the HTML5 Canvas API. This API helps you draw 2D graphics in your browser using JavaScript! There are many things you can create with the JavaScript canvas: games, animation, data visualization, image processing, real-time video processing/recording, diagramming, and anything else your imagination can think of.
In this tutorial, we'll discuss simple 2D graphics, but you can use the WebGL API to render 3D graphics as well. Additionally, WebGL lets you render hardware-accelerated 2D graphics in case need to better performance.
History
Before the Canvas API was created, most people leveraged Adobe's Flash Player or ran Java Applets inside the browser (mostly Internet Explorer at the time).
In fact, I remember the days of playing the original Minecraft beta inside a Java applet. I also remember seeing a lot of animations, created using Flash, on Newgrounds. However, both Flash and Java Applets weren't secure and also required you to learn a different language instead of using JavaScript.
The Canvas API was initially introduced by Apple for use in their own Mac OS X WebKit component in 2004 according to Wikipedia. Eventually, it was standardized by the Web Hypertext Application Technology Working Group (WHATWG), a group that has helped HTML and Browser APIs evolve throughout the years.
When HTML5 came out, the world ushered in a new era of creativity as web developers could draw pixels on the screen with precise control using JavaScript. JavaScript became more powerful on that day. The Canvas API enables developers to draw pixels, images, and even video from your computer's camera to the screen.
Getting Started
To get started with the Canvas API, we need create an HTML file called index.html with a <canvas> element:
<!DOCTYPE html>
<html lang="en">
<head>
  <meta charset="UTF-8">
  <meta name="viewport" content="width=device-width, initial-scale=1.0">
  <title>Canvas API Tutorial</title>
</head>
<body>
  <h1>Canvas API Tutorial</h1>
  <canvas id="canvas"></canvas>
</body>
</html>
Notice that we have assigned an ID to the <canvas> element. We will leverage this ID later in a JavaScript file.
Let's add a border around our canvas, so we can see where it is. We'll make a CSS file called style.css and add the following code:
#canvas {
  border: 1px solid black;
}
Then, add a link to the stylesheet in your index.html file:
<!DOCTYPE html>
<html lang="en">
<head>
  <meta charset="UTF-8">
  <meta name="viewport" content="width=device-width, initial-scale=1.0">
  <title>Canvas API Tutorial</title>
  <link rel="stylesheet" href="style.css">
</head>
<body>
  <h1>Canvas API Tutorial</h1>
  <canvas id="canvas"></canvas>
</body>
</html>
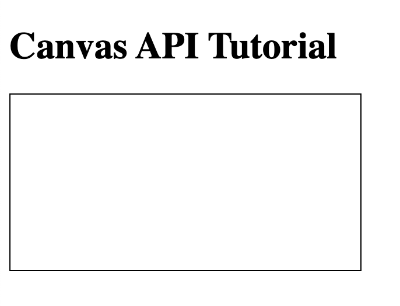
Reload the page, and you should see a border around the canvas element. By default, it will be a size of 300px by 150px (width by height).
Then, we can create a script called canvas.js and place it inside the index.html file:
<!DOCTYPE html>
<html lang="en">
<head>
  <meta charset="UTF-8">
  <meta name="viewport" content="width=device-width, initial-scale=1.0">
  <title>Canvas API Tutorial</title>
  <link rel="stylesheet" href="style.css">
</head>
<body>
  <h1>Canvas API Tutorial</h1>
  <canvas id="canvas"></canvas>
  <script src="canvas.js"></script>
</body>
</html>
Make sure the script is at the bottom of the <body> element to make sure that the canvas has a chance to load.
Inside canvas.js, we need to grab a reference to the <canvas> element. We can use the ID we assigned to it.
const canvas = document.getElementById('canvas')
Now, we need to grab the canvas's context:
const canvas = document.getElementById('canvas')
const ctx = canvas.getContext('2d')
The context of the canvas is an important feature. We will use this context to draw images to the screen. Any time you want to render pixels or images inside the canvas, it must be done through the canvas's context.
In programming, a "context" is typically a variable that contains lots of information about a structure (in this case, a canvas) and shared between different components. Libraries/frameworks such as React or Flutter use the concept of a "context" as well. Contexts help us keep track of data that we can reference later. Of course, the term "context" varies by application.
When viewing open source code online, you will commonly see people use ctx as the variable name that refers to the canvas's context, but you can choose whatever name you want. This context internally stores information about the canvas, and we'll use it frequently with the Canvas API. If you're curious to see what's inside the context, we can log it to the console:
console.log(ctx)
You should see an object similar to the following in Google Chrome:
CanvasRenderingContext2D {
  canvas: canvas#canvas
  direction: "ltr"
  fillStyle: "#0000ff"
  filter: "none"
  font: "10px sans-serif"
  globalAlpha: 1
  globalCompositeOperation: "source-over"
  imageSmoothingEnabled: true
  imageSmoothingQuality: "low"
  lineCap: "butt"
  lineDashOffset: 0
  lineJoin: "miter"
  lineWidth: 1
  miterLimit: 10
  shadowBlur: 0
  shadowColor: "rgba(0, 0, 0, 0)"
  shadowOffsetX: 0
  shadowOffsetY: 0
  strokeStyle: "#000000"
  textAlign: "start"
  textBaseline: "alphabetic"
  __proto__: CanvasRenderingContext2D
}
The Canvas API provides methods for setting these properties to new values.
Now that you know about the context, let's draw a simple square:
const canvas = document.getElementById('canvas')
const ctx = canvas.getContext('2d')

ctx.fillStyle = 'blue'
ctx.fillRect(0, 0, 100, 100)
This will draw a blue square to the canvas. In case you don't remember, squares are a type of rectangle, so it's okay to use the fillRect function. There's no need to have a fillSquare function (except for maybe convenience), which is why there isn't one available in the Canvas API.
Let's look at what this code is doing. First, we set the fillStyle to blue using the context we mentioned earlier. This will internally alter the context object so that the next time you draw a shape, it will be blue.
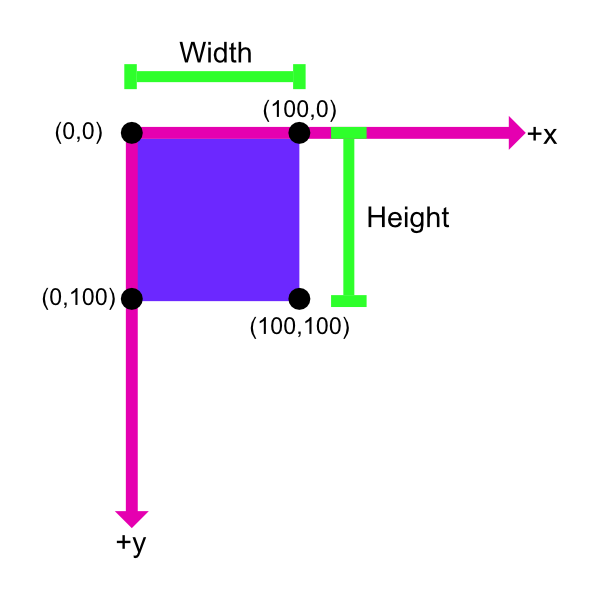
Next, we are creating a rectangle with a fill color using the fillRect method. This function accepts four parameters:
- x: The x-axis coordinate of the rectangle's starting point.
- y: The y-axis coordinate of the rectangle's starting point.
- width: The rectangle's width. Positive values are to the right, and negative to the left.
- height: The rectangle's height. Positive values are down, and negative are up.
It's important to understand how the canvas coordinates are defined. It's not the same as the plotting graphs you learned in your math classes in school. The coordinate system for a 2D canvas is setup so the origin is located at the top-left corner of the canvas. The x coordinate increases as you go right like normal, but the y coordinate increases as you go down.
Setting Width and Height on the Canvas
Instinctively, you may want to set the width and height of the canvas using CSS. However, the <canvas> HTML element has its own width and height attributes. As stated on MDN, you should change these attributes when scaling the canvas. Otherwise, you'll run into weird issues. Let's look at an example.
Suppose, we were drawing a square like before using the file, canvas.js:
const canvas = document.getElementById('canvas')
const ctx = canvas.getContext('2d')

ctx.fillStyle = 'blue'
ctx.fillRect(0, 0, 100, 100)
If we decide to change the width and height in style.css, we'll notice that the blue square becomes a rectangle instead. That's not what we want!
#canvas {
  border: 1px solid black;
  width: 300px;
  height: 300px;
}
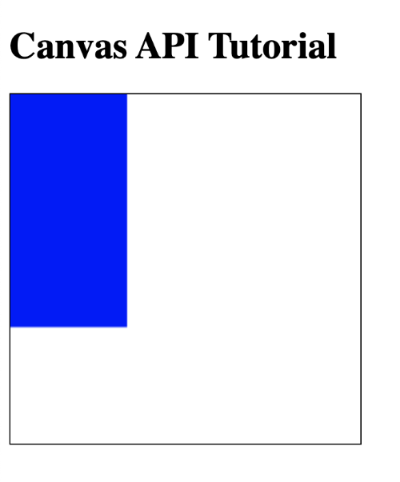
This rectangle is drawn instead of a square because the coordinate system inside the canvas is now stretched. By default, the canvas has a width of 300px and a height of 150px. By scaling the height to 300px using CSS, we are stretching the canvas element itself, instead of changing the "canvas space" that exists within the element. Since the height of the element is stretched to be 300px instead of 150px, the aspect ratio is no longer 1:1 (width:height), but now 1:2 (width:height). When we use the canvas context to draw a rectangle using fillRect, it will now draw 2 pixels along the height for every pixel we draw, which means that the rectangle is 200 pixels in height instead of 100 pixels, making this a rectangle instead of a square.
Instead, we should change the width and height attributes of the <canvas> element back in our index.html file. These attributes alter the size of the "canvas space", not the size of the element, which is what we want.
<!DOCTYPE html>
<html lang="en">
<head>
  <meta charset="UTF-8">
  <meta name="viewport" content="width=device-width, initial-scale=1.0">
  <title>Canvas API Tutorial</title>
  <link rel="stylesheet" href="style.css">
</head>
<body>
  <h1>Canvas API Tutorial</h1>
  <canvas id="canvas" width="300" height="300"></canvas>
  <script src="canvas.js"></script>
</body>
</html>
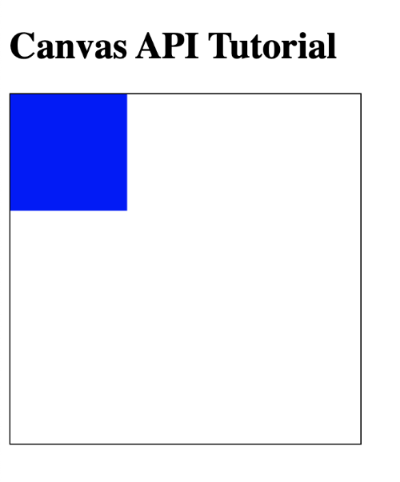
The square has returned! Our canvas looks roomier now too!
If you would like to control the width and height of the canvas through JavaScript, then you can use the width and height properties on the canvas element:
const canvas = document.getElementById('canvas')
const ctx = canvas.getContext('2d')

canvas.width = 300
canvas.height = 300

ctx.fillStyle = 'blue'
ctx.fillRect(0, 0, 100, 100)
You need to make sure to set the width and height of the canvas before drawing to the canvas. Otherwise, your shapes might not get drawn, or they'll get drawn in an unexpected way.
Canvas Playground
If you you want to make a simple rectangle or circle using the HTML5 Canvas API and play around with values, I encourage you to explore the Canvas Playground. I developed this small app to allow people to play with parameters that update the canvas in real time. It also generates JavaScript code on the fly, which is very beneficial for beginners.
Get Inspired
Here are some awesome products that use the Canvas API:
- Phaser: game framework for building desktop and mobile games with JavaScript
- app.diagrams.net (formerly draw.io): diagramming software that can build flowcharts, sequence diagrams, and internally uses mxGraph
- Desmos: math plotting software
- Paperjs: vector graphics scripting framework
- Fabric.js: provides interactive object model on top of a canvas element, animation support, and tools for converting between SVG and Canvas
- Chart.js: graphing and data visualization library
- Lena.js: image processing library to provide different filters to images
- OpenCV.js: wrapper around OpenCV for utilizing computer vision tools in JavaScript
- p5.js: library that provides tools to help users work with various media including text, images, sound, and video
Here are some links to view awesome projects developed by the open source community to help you get inspired to learn the Canvas API:
As you can see, the possibilities of what you can create with the Canvas API are endless! 😃
Conclusion
There are plenty of topics to discuss related to the HTML5 canvas! This is only the beginning. Please check out the resources mentioned above to see how powerful the Canvas API really is! Happy coding!