Snowman Shader in Shadertoy
Do you wanna build a snowmannnnnnnn ☃️ 🎶?
Come on, let's go and code.
Trust me, it won't be a bore.
Prepare your keyboard.
It's time to ray march awayyyyyyy!!!!
Greetings, friends! You have made it so far on your Shadertoy journey! I'm so proud! Even if you haven't read any of my past articles and landed here from Google, I'm still proud you visited my website 😃. If you're new to Shadertoy or even shaders in general, please visit Part 1 of my Shadertoy tutorial series.
In this article, I will show you how to make a snowman shader using the lessons in my Shadertoy tutorial series. We'll create a simple snowman, add color using structs, and then add lots of details to our scene to create an amazing shader!!!
Initial Setup
We'll start with the ray marching template we used at the beginning of Part 14 of my Shadertoy tutorial series.
const int MAX_MARCHING_STEPS = 255;
const float MIN_DIST = 0.0;
const float MAX_DIST = 100.0;
const float PRECISION = 0.001;
const float EPSILON = 0.0005;
const float PI = 3.14159265359;
const vec3 COLOR_BACKGROUND = vec3(.741, .675, .82);
const vec3 COLOR_AMBIENT = vec3(0.42, 0.20, 0.1);

mat2 rotate2d(float theta) {
  float s = sin(theta), c = cos(theta);
  return mat2(c, -s, s, c);
}

float sdSphere(vec3 p, float r, vec3 offset)
{
  return length(p - offset) - r;
}

float scene(vec3 p) {
  return sdSphere(p, 1., vec3(0, 0, 0));
}

float rayMarch(vec3 ro, vec3 rd) {
  float depth = MIN_DIST;
  float d; // distance ray has travelled

  for (int i = 0; i < MAX_MARCHING_STEPS; i++) {
    vec3 p = ro + depth * rd;
    d = scene(p);
    depth += d;
    if (d < PRECISION || depth > MAX_DIST) break;
  }

  d = depth;

  return d;
}

vec3 calcNormal(in vec3 p) {
    vec2 e = vec2(1, -1) * EPSILON;
    return normalize(
      e.xyy * scene(p + e.xyy) +
      e.yyx * scene(p + e.yyx) +
      e.yxy * scene(p + e.yxy) +
      e.xxx * scene(p + e.xxx));
}

mat3 camera(vec3 cameraPos, vec3 lookAtPoint) {
    vec3 cd = normalize(lookAtPoint - cameraPos);
    vec3 cr = normalize(cross(vec3(0, 1, 0), cd));
    vec3 cu = normalize(cross(cd, cr));

    return mat3(-cr, cu, -cd);
}

void mainImage( out vec4 fragColor, in vec2 fragCoord )
{
  vec2 uv = (fragCoord-.5*iResolution.xy)/iResolution.y;
  vec2 mouseUV = iMouse.xy/iResolution.xy;

  if (mouseUV == vec2(0.0)) mouseUV = vec2(0.5); // trick to center mouse on page load

  vec3 col = vec3(0);
  vec3 lp = vec3(0); // lookat point
  vec3 ro = vec3(0, 0, 3); // ray origin that represents camera position

  float cameraRadius = 2.;
  ro.yz = ro.yz * cameraRadius * rotate2d(mix(-PI/2., PI/2., mouseUV.y));
  ro.xz = ro.xz * rotate2d(mix(-PI, PI, mouseUV.x)) + vec2(lp.x, lp.z);

  vec3 rd = camera(ro, lp) * normalize(vec3(uv, -1)); // ray direction

  float d = rayMarch(ro, rd); // signed distance value to closest object

  if (d > MAX_DIST) {
    col = COLOR_BACKGROUND; // ray didn't hit anything
  } else {
    vec3 p = ro + rd * d; // point discovered from ray marching
    vec3 normal = calcNormal(p); // surface normal

    vec3 lightPosition = vec3(0, 2, 2);
    vec3 lightDirection = normalize(lightPosition - p) * .65; // The 0.65 is used to decrease the light intensity a bit

    float dif = clamp(dot(normal, lightDirection), 0., 1.) * 0.5 + 0.5; // diffuse reflection mapped to values between 0.5 and 1.0

    col = vec3(dif) + COLOR_AMBIENT;
  }

  fragColor = vec4(col, 1.0);
}
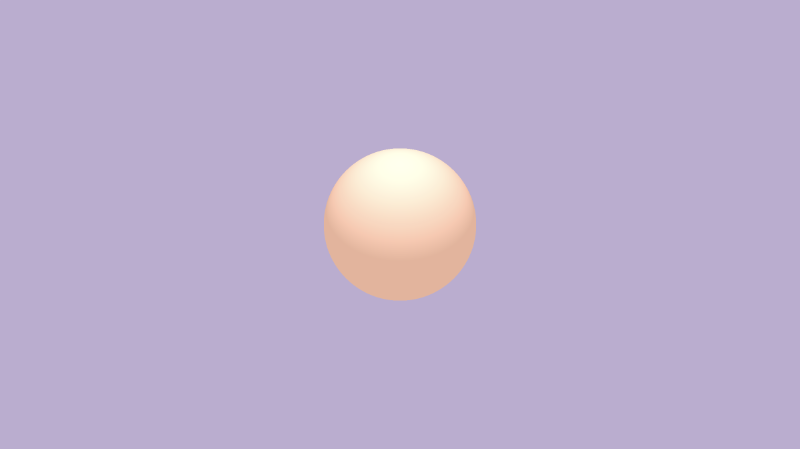
When you run this code, you should see a sphere appear in the center of the screen. It kinda looks like a snowball, doesn't it?
Building a Snowman Model
When building 3D models using ray marching, it's best to think about what SDFs we'll need to build a snowman. A snowman is typically made using two or three spheres. For our snowman, we'll keep it simple and build it using only two spheres.
Let's draw two spheres to the scene. We can use the opUnion function we learned in Part 14 to draw more than one shape to the scene.
float opUnion(float d1, float d2) {
  return min(d1, d2);
}
We've been using this function already in the previous tutorials. It simply takes the minimum "signed distance" between two SDFs.
float scene(vec3 p) {
  float bottomSnowball = sdSphere(p, 1., vec3(0, -1, 0));
  float topSnowball = sdSphere(p, 0.75, vec3(0, 0.5, 0));

  return opUnion(bottomSnowball, topSnowball);
}

Right away, you can our snowman starting to take shape, but it looks awkward at the intersection where the two spheres meet. As we learned in Part 14 of my Shadertoy tutorial series, we can blend two shapes smoothly together by using the opSmoothUnion function or smin function, if you want to use a shorter name.
float opSmoothUnion(float d1, float d2, float k) {
  float h = clamp( 0.5 + 0.5*(d2-d1)/k, 0.0, 1.0 );
  return mix( d2, d1, h ) - k*h*(1.0-h);
}
Now, let's replace the opUnion function with opSmoothUnion in our scene. We'll use a value of 0.2 as the smoothing factor, k.
float scene(vec3 p) {
  float bottomSnowball = sdSphere(p, 1., vec3(0, -1, 0));
  float topSnowball = sdSphere(p, 0.75, vec3(0, 0.5, 0));

  float d = opSmoothUnion(bottomSnowball, topSnowball, 0.2);
  return d;
}

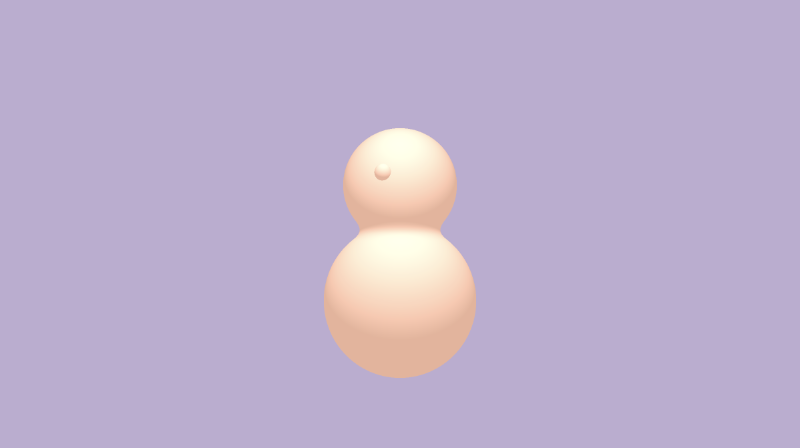
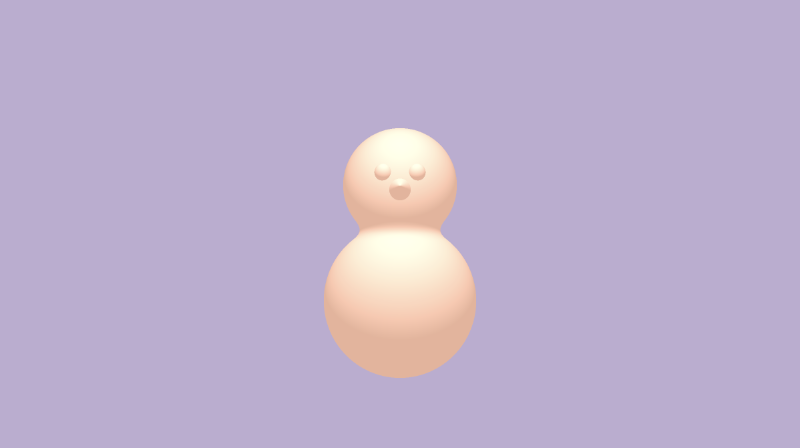
That looks much better! The snowman is missing some eyes though. People tend to give them eyes using buttons or some other round objects. We'll give our snowman spherical eyes. Let's start with the left eye.
float scene(vec3 p) {
  float bottomSnowball = sdSphere(p, 1., vec3(0, -1, 0));
  float topSnowball = sdSphere(p, 0.75, vec3(0, 0.5, 0));
  float leftEye = sdSphere(p, .1, vec3(-0.2, 0.6, 0.7));

  float d = opSmoothUnion(bottomSnowball, topSnowball, 0.2);
  d = opUnion(d, leftEye);
  return d;
}
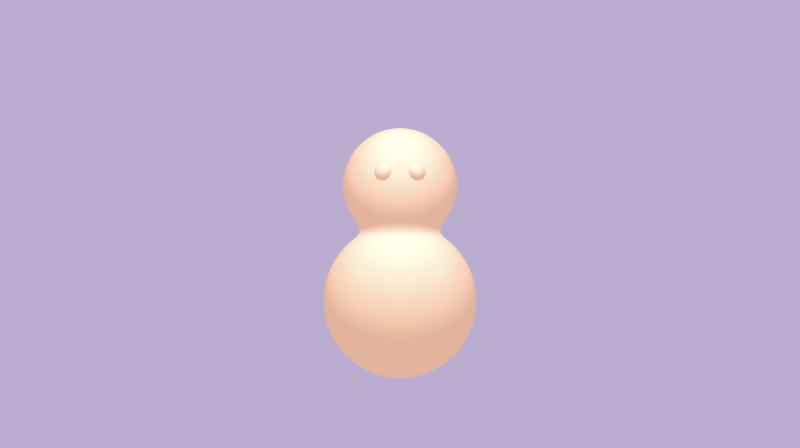
The right eye will use the same offset value as the left eye except the x-axis will be mirrored.
float scene(vec3 p) {
  float bottomSnowball = sdSphere(p, 1., vec3(0, -1, 0));
  float topSnowball = sdSphere(p, 0.75, vec3(0, 0.5, 0));
  float leftEye = sdSphere(p, .1, vec3(-0.2, 0.6, 0.7));
  float rightEye = sdSphere(p, .1, vec3(0.2, 0.6, 0.7));

  float d = opSmoothUnion(bottomSnowball, topSnowball, 0.2);
  d = opUnion(d, leftEye);
  d = opUnion(d, rightEye);
  return d;
}
Next, the snowman needs a nose. People tend to make noses for snowmen out of carrots. We can simulate a carrot nose by using a cone SDF from Inigo Quilez's list of 3D SDFs. We'll choose the SDF called "Cone - bound (not exact)" which has the following function declaration:
float sdCone( vec3 p, vec2 c, float h )
{
  float q = length(p.xz);
  return max(dot(c.xy,vec2(q,p.y)),-h-p.y);
}
This is for a cone pointing straight up. We want the tip of the cone to face us, toward the positive z-axis. To switch this, we'll replace p.xz with p.xy and replace p.y with p.z.
float sdCone( vec3 p, vec2 c, float h )
{
  p -= offset;
  float q = length(p.xy);
  return max(dot(c.xy,vec2(q,p.z)),-h-p.z);
}
We also need to add an offset parameter to this function, so we can move the cone around in 3D space. Therefore, we end up with the following function declaration for the cone SDF.
float sdCone( vec3 p, vec2 c, float h, vec3 offset )
{
  p -= offset;
  float q = length(p.xy);
  return max(dot(c.xy,vec2(q,p.z)),-h-p.z);
}
To use this SDF, we need to create an angle for the cone. This requires playing around with the value a bit. A value of 75 degrees seems to work fine. You can use the radians function that is built into the GLSL language to convert a number from degrees to radians. The parameters, c and h, are used to control the dimensions of the cone.
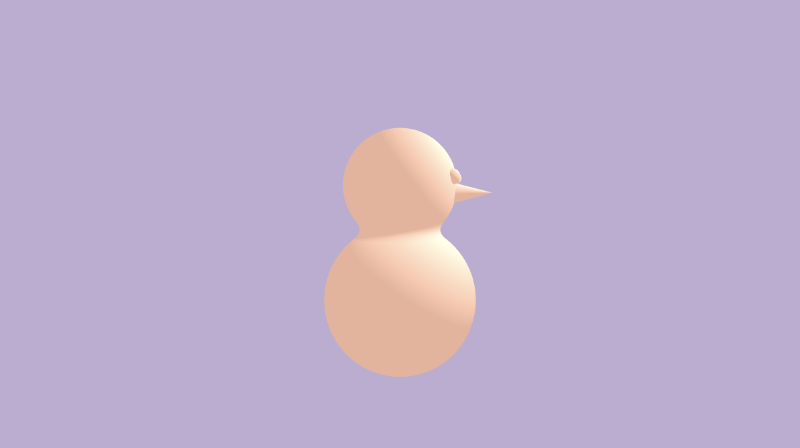
Let's add a nose to our snowman!
float scene(vec3 p) {
  float bottomSnowball = sdSphere(p, 1., vec3(0, -1, 0));
  float topSnowball = sdSphere(p, 0.75, vec3(0, 0.5, 0));

  float leftEye = sdSphere(p, .1, vec3(-0.2, 0.6, 0.7));
  float rightEye = sdSphere(p, .1, vec3(0.2, 0.6, 0.7));

  float noseAngle = radians(75.);
  float nose = sdCone(p, vec2(sin(noseAngle), cos(noseAngle)), 0.5, vec3(0, 0.4, 1.2));

  float d = opSmoothUnion(bottomSnowball, topSnowball, 0.2);
  d = opUnion(d, leftEye);
  d = opUnion(d, rightEye);
  d = opUnion(d, nose);
  return d;
}
You can use your mouse to move the camera around the snowman to make sure the cone looks fine.
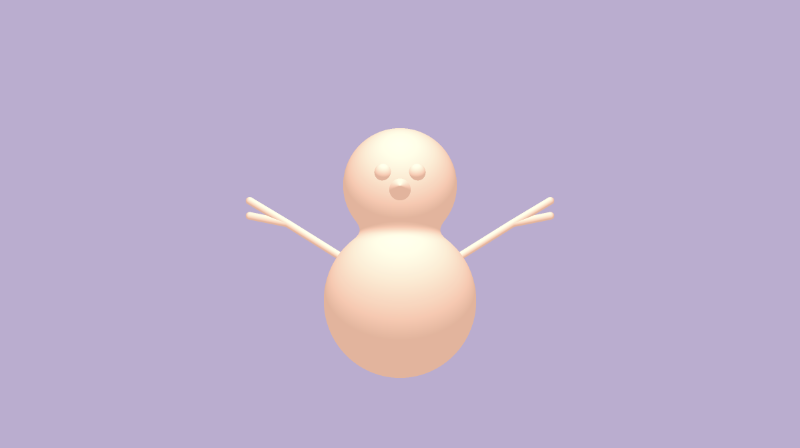
Let's add arms to the snowman. Typically, the arms are made of sticks. We can simulate sticks by using a 3D line or "capsule." In Inigo Quilez's list of 3D SDFs, there's an SDF called "Capsule / Line - exact" that we can leverage for building a snowman arm.
float sdCapsule( vec3 p, vec3 a, vec3 b, float r )
{
  vec3 pa = p - a, ba = b - a;
  float h = clamp( dot(pa,ba)/dot(ba,ba), 0.0, 1.0 );
  return length( pa - ba*h ) - r;
}
Add an offset parameter to this function, so we can move the capsule around in 3D space.
float sdCapsule( vec3 p, vec3 a, vec3 b, float r, vec3 offset )
{
  p -= offset;
  vec3 pa = p - a, ba = b - a;
  float h = clamp( dot(pa,ba)/dot(ba,ba), 0.0, 1.0 );
  return length( pa - ba*h ) - r;
}
Then, we'll add a capsule in our 3D scene to simulate the left arm of the snowman.
float scene(vec3 p) {
  float bottomSnowball = sdSphere(p, 1., vec3(0, -1, 0));
  float topSnowball = sdSphere(p, 0.75, vec3(0, 0.5, 0));

  float leftEye = sdSphere(p, .1, vec3(-0.2, 0.6, 0.7));
  float rightEye = sdSphere(p, .1, vec3(0.2, 0.6, 0.7));

  float noseAngle = radians(75.);
  float nose = sdCone(p, vec2(sin(noseAngle), cos(noseAngle)), 0.5, vec3(0, 0.4, 1.2));

  float mainBranch = sdCapsule(p, vec3(0, 0.5, 0), vec3(0.8, 0, 0.), 0.05, vec3(-1.5, -0.5, 0));

  float d = opSmoothUnion(bottomSnowball, topSnowball, 0.2);
  d = opUnion(d, leftEye);
  d = opUnion(d, rightEye);
  d = opUnion(d, nose);
  d = opUnion(d, mainBranch);
  return d;
}
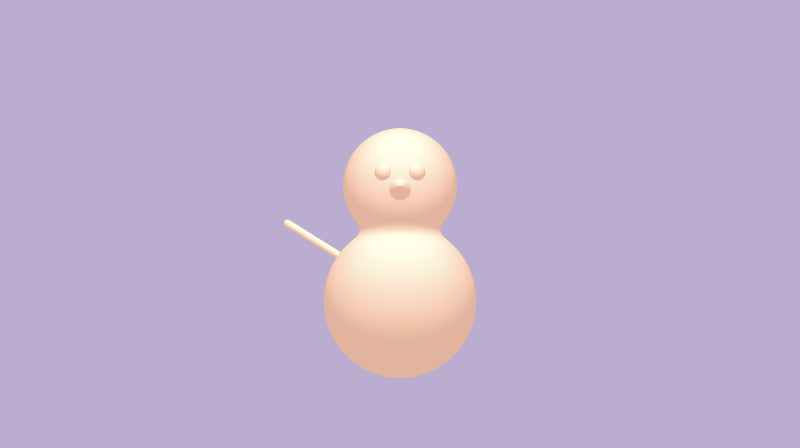
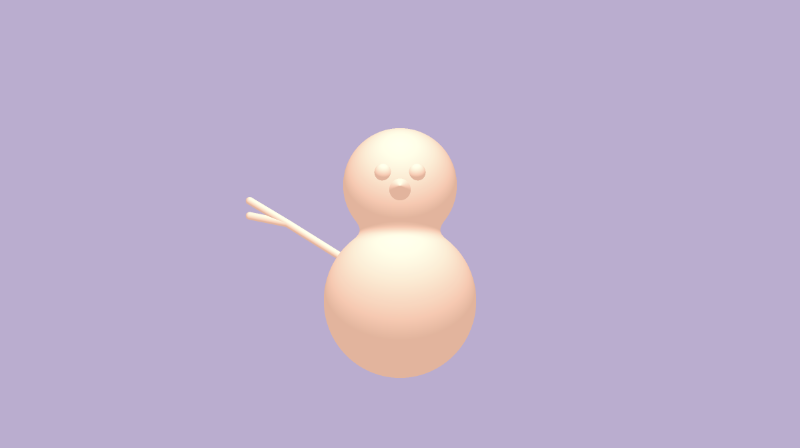
The arm looks a bit too small and kinda awkward. Let's add a couple small capsules that branch off the "main branch" arm, so that it looks like the arm is built out of a tree branch.
float scene(vec3 p) {
  float bottomSnowball = sdSphere(p, 1., vec3(0, -1, 0));
  float topSnowball = sdSphere(p, 0.75, vec3(0, 0.5, 0));

  float leftEye = sdSphere(p, .1, vec3(-0.2, 0.6, 0.7));
  float rightEye = sdSphere(p, .1, vec3(0.2, 0.6, 0.7));

  float noseAngle = radians(75.);
  float nose = sdCone(p, vec2(sin(noseAngle), cos(noseAngle)), 0.5, vec3(0, 0.4, 1.2));

  float mainBranch = sdCapsule(p, vec3(0, 0.5, 0), vec3(0.8, 0, 0.), 0.05, vec3(-1.5, -0.5, 0));
  float smallBranchBottom = sdCapsule(p, vec3(0, 0.1, 0), vec3(0.5, 0, 0.), 0.05, vec3(-2, 0, 0));
  float smallBranchTop = sdCapsule(p, vec3(0, 0.3, 0), vec3(0.5, 0, 0.), 0.05, vec3(-2, 0, 0));

  float d = opSmoothUnion(bottomSnowball, topSnowball, 0.2);
  d = opUnion(d, leftEye);
  d = opUnion(d, rightEye);
  d = opUnion(d, nose);
  d = opUnion(d, mainBranch);
  d = opUnion(d, smallBranchBottom);
  d = opUnion(d, smallBranchTop);
  return d;
}
For the right arm, we need to apply the same three capsule SDFs but flip the sign of the x-component to "mirror" the arm on the other side of the snowman. We could write another three lines for the right arm, one for each capsule SDF, or we can get clever. The snowman is currently centered in the middle of our screen. We can take advantage of symmetry to draw the right arm with the same offset as the left arm but with a positive x-component instead of negative.
Let's create a custom SDF that merges the three branches into one SDF called sdArm.
float sdArm(vec3 p) {
  float mainBranch = sdCapsule(p, vec3(0, 0.5, 0), vec3(0.8, 0, 0.), 0.05, vec3(-1.5, -0.5, 0));
  float smallBranchBottom = sdCapsule(p, vec3(0, 0.1, 0), vec3(0.5, 0, 0.), 0.05, vec3(-2, 0, 0));
  float smallBranchTop = sdCapsule(p, vec3(0, 0.3, 0), vec3(0.5, 0, 0.), 0.05, vec3(-2, 0, 0));

  float d = opUnion(mainBranch, smallBranchBottom);
  d = opUnion(d, smallBranchTop);
  return d;
}
Then, we can use this function inside our scene function.
float scene(vec3 p) {
  float bottomSnowball = sdSphere(p, 1., vec3(0, -1, 0));
  float topSnowball = sdSphere(p, 0.75, vec3(0, 0.5, 0));

  float leftEye = sdSphere(p, .1, vec3(-0.2, 0.6, 0.7));
  float rightEye = sdSphere(p, .1, vec3(0.2, 0.6, 0.7));

  float noseAngle = radians(75.);
  float nose = sdCone(p, vec2(sin(noseAngle), cos(noseAngle)), 0.5, vec3(0, 0.4, 1.2));

  float leftArm = sdArm(p);

  float d = opSmoothUnion(bottomSnowball, topSnowball, 0.2);
  d = opUnion(d, leftEye);
  d = opUnion(d, rightEye);
  d = opUnion(d, nose);
  d = opUnion(d, leftArm);
  return d;
}
Let's make a custom operation called opFlipX that will flip the sign of the x-component of the point passed into it.
vec3 opFlipX(vec3 p) {
  p.x *= -1.;
  return p;
}
Then, we can use this function inside the scene function to draw the right arm.
float scene(vec3 p) {
  float bottomSnowball = sdSphere(p, 1., vec3(0, -1, 0));
  float topSnowball = sdSphere(p, 0.75, vec3(0, 0.5, 0));

  float leftEye = sdSphere(p, .1, vec3(-0.2, 0.6, 0.7));
  float rightEye = sdSphere(p, .1, vec3(0.2, 0.6, 0.7));

  float noseAngle = radians(75.);
  float nose = sdCone(p, vec2(sin(noseAngle), cos(noseAngle)), 0.5, vec3(0, 0.4, 1.2));

  float leftArm = sdArm(p);
  float rightArm = sdArm(opFlipX(p));

  float d = opSmoothUnion(bottomSnowball, topSnowball, 0.2);
  d = opUnion(d, leftEye);
  d = opUnion(d, rightEye);
  d = opUnion(d, nose);
  d = opUnion(d, leftArm);
  d = opUnion(d, rightArm);
  return d;
}
Voilà! We used symmetry to draw the right arm of the snowman! If we decide to move the arm a bit, it'll automatically be reflected in the offset of the right arm.
We can use the new opFlipX operation for the right eye of the snowman as well. Let's create a custom SDF for an eye of the snowman.
float sdEye(vec3 p) {
  return sdSphere(p, .1, vec3(-0.2, 0.6, 0.7));
}
Next, we can use it inside the scene function to draw both the left eye and right eye.
float scene(vec3 p) {
  float bottomSnowball = sdSphere(p, 1., vec3(0, -1, 0));
  float topSnowball = sdSphere(p, 0.75, vec3(0, 0.5, 0));

  float leftEye = sdEye(p);
  float rightEye = sdEye(opFlipX(p));

  float noseAngle = radians(75.);
  float nose = sdCone(p, vec2(sin(noseAngle), cos(noseAngle)), 0.5, vec3(0, 0.4, 1.2));

  float leftArm = sdArm(p);
  float rightArm = sdArm(opFlipX(p));

  float d = opSmoothUnion(bottomSnowball, topSnowball, 0.2);
  d = opUnion(d, leftEye);
  d = opUnion(d, rightEye);
  d = opUnion(d, nose);
  d = opUnion(d, leftArm);
  d = opUnion(d, rightArm);
  return d;
}
The snowman looks great so far, but it's missing some pizazz. It could be great if the snowman had a top hat. We can simulate a top hat by combining two cylinders together. For that, we'll need to grab the cylinder SDF titled "Capped Cylinder - exact" from Inigo Quilez's list of 3D SDFs.
float sdCappedCylinder( vec3 p, float h, float r )
{
  vec2 d = abs(vec2(length(p.xz),p.y)) - vec2(h,r);
  return min(max(d.x,d.y),0.0) + length(max(d,0.0));
}
Make sure to add an offset, so we can move the hat around in 3D space.
float sdCappedCylinder( vec3 p, float h, float r, vec3 offset )
{
  p -= offset;
  vec2 d = abs(vec2(length(p.xz),p.y)) - vec2(h,r);
  return min(max(d.x,d.y),0.0) + length(max(d,0.0));
}
We can create a thin cylinder for the bottom part of the hat, and a tall cylinder for the top part of the hat.
float scene(vec3 p) {
  float bottomSnowball = sdSphere(p, 1., vec3(0, -1, 0));
  float topSnowball = sdSphere(p, 0.75, vec3(0, 0.5, 0));

  float leftEye = sdEye(p);
  float rightEye = sdEye(opFlipX(p));

  float noseAngle = radians(75.);
  float nose = sdCone(p, vec2(sin(noseAngle), cos(noseAngle)), 0.5, vec3(0, 0.4, 1.2));

  float leftArm = sdArm(p);
  float rightArm = sdArm(opFlipX(p));

  float hatBottom = sdCappedCylinder(p, 0.5, 0.05, vec3(0, 1.2, 0));
  float hatTop = sdCappedCylinder(p, 0.3, 0.3, vec3(0, 1.5, 0));

  float d = opSmoothUnion(bottomSnowball, topSnowball, 0.2);
  d = opUnion(d, leftEye);
  d = opUnion(d, rightEye);
  d = opUnion(d, nose);
  d = opUnion(d, leftArm);
  d = opUnion(d, rightArm);
  d = opUnion(d, hatBottom);
  d = opUnion(d, hatTop);
  return d;
}

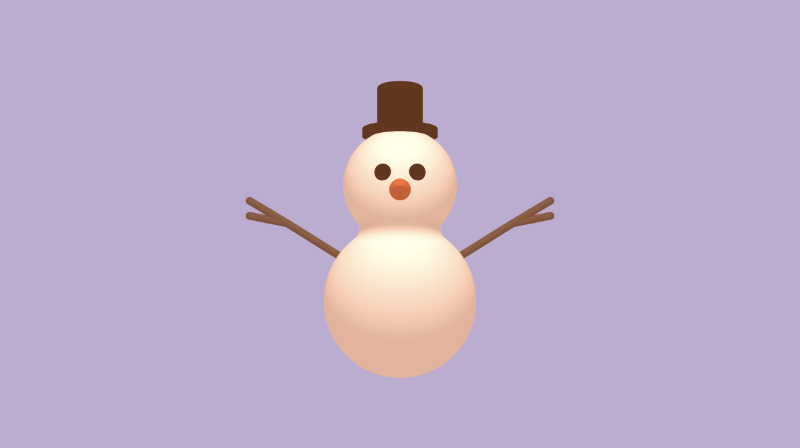
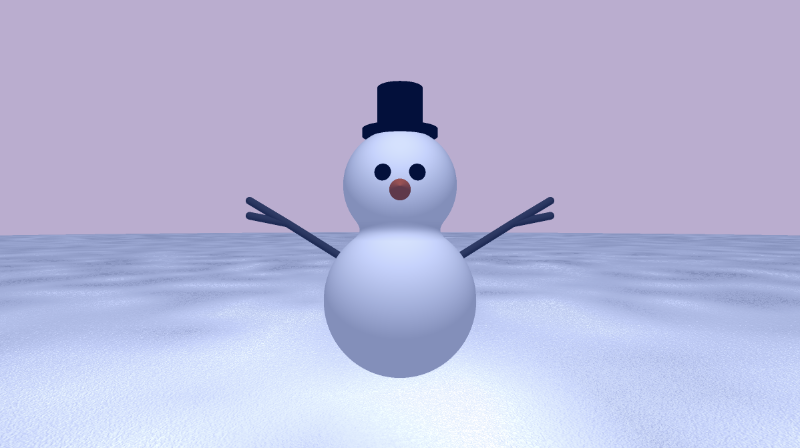
Our snowman is looking dapper now! 😃
Organizing Code with Custom SDFs
When we color the snowman, we'll need to target the individual parts of the snowman that have unique colors. We can organize the code by creating custom SDFs for each part of the snowman that will have a unique color.
Let's create an SDF called sdBody for the body of the snowman.
float sdBody(vec3 p) {
  float bottomSnowball = sdSphere(p, 1., vec3(0, -1, 0));
  float topSnowball = sdSphere(p, 0.75, vec3(0, 0.5, 0));

  return opSmoothUnion(bottomSnowball, topSnowball, 0.2);
}
We already created an SDF for the eyes called sdEyes, but we need to create an SDF for the nose. Create a new function called sdNose with the following contents.
float sdNose(vec3 p) {
  float noseAngle = radians(75.);
  return sdCone(p, vec2(sin(noseAngle), cos(noseAngle)), 0.5, vec3(0, 0.4, 1.2));
}
We already created a custom SDF for the arms, but let's create one for the hat called sdHat with the following code.
float sdHat(vec3 p) {
  float hatBottom = sdCappedCylinder(p, 0.5, 0.05, vec3(0, 1.2, 0));
  float hatTop = sdCappedCylinder(p, 0.3, 0.3, vec3(0, 1.5, 0));

  return opUnion(hatBottom, hatTop);
}
Now, we can adjust our scene function to use all of our custom SDFs that already take account for the offset or position of each part of the snowman inside the function declaration.
float scene(vec3 p) {
  float body = sdBody(p);
  float leftEye = sdEye(p);
  float rightEye = sdEye(opFlipX(p));
  float nose = sdNose(p);
  float leftArm = sdArm(p);
  float rightArm = sdArm(opFlipX(p));
  float hat = sdHat(p);

  float d = body;
  d = opUnion(d, leftEye);
  d = opUnion(d, rightEye);
  d = opUnion(d, nose);
  d = opUnion(d, leftArm);
  d = opUnion(d, rightArm);
  d = opUnion(d, hat);
  return d;
}
Looks much cleaner now! There's one more thing we can do to make this code a bit more abstract. If we plan on drawing multiple snowmen to the scene, then we should create a custom SDF that draws an entire snowman. Let's create a new function called sdSnowman that does just that.
float sdSnowman(vec3 p) {
  float body = sdBody(p);
  float leftEye = sdEye(p);
  float rightEye = sdEye(opFlipX(p));
  float nose = sdNose(p);
  float leftArm = sdArm(p);
  float rightArm = sdArm(opFlipX(p));
  float hat = sdHat(p);

  float d = body;
  d = opUnion(d, leftEye);
  d = opUnion(d, rightEye);
  d = opUnion(d, nose);
  d = opUnion(d, leftArm);
  d = opUnion(d, rightArm);
  d = opUnion(d, hat);
  return d;
}
Finally, our scene function will simply return the value of snowman SDF.
float scene(vec3 p) {
 return sdSnowman(p);
}
Our snowman is now built and ready to be colored! You can find the finished code for this entire scene below.
const int MAX_MARCHING_STEPS = 255;
const float MIN_DIST = 0.0;
const float MAX_DIST = 100.0;
const float PRECISION = 0.001;
const float EPSILON = 0.0005;
const float PI = 3.14159265359;
const vec3 COLOR_BACKGROUND = vec3(.741, .675, .82);
const vec3 COLOR_AMBIENT = vec3(0.42, 0.20, 0.1);

mat2 rotate2d(float theta) {
  float s = sin(theta), c = cos(theta);
  return mat2(c, -s, s, c);
}

float opUnion(float d1, float d2) {
  return min(d1, d2);
}

float opSmoothUnion(float d1, float d2, float k) {
  float h = clamp( 0.5 + 0.5*(d2-d1)/k, 0.0, 1.0 );
  return mix( d2, d1, h ) - k*h*(1.0-h);
}

vec3 opFlipX(vec3 p) {
  p.x *= -1.;
  return p;
}

float sdSphere(vec3 p, float r, vec3 offset)
{
  return length(p - offset) - r;
}

float sdCone( vec3 p, vec2 c, float h, vec3 offset )
{
  p -= offset;
  float q = length(p.xy);
  return max(dot(c.xy,vec2(q,p.z)),-h-p.z);
}

float sdCapsule( vec3 p, vec3 a, vec3 b, float r, vec3 offset )
{
  p -= offset;
  vec3 pa = p - a, ba = b - a;
  float h = clamp( dot(pa,ba)/dot(ba,ba), 0.0, 1.0 );
  return length( pa - ba*h ) - r;
}

float sdCappedCylinder( vec3 p, float h, float r, vec3 offset )
{
  p -= offset;
  vec2 d = abs(vec2(length(p.xz),p.y)) - vec2(h,r);
  return min(max(d.x,d.y),0.0) + length(max(d,0.0));
}

float sdBody(vec3 p) {
  float bottomSnowball = sdSphere(p, 1., vec3(0, -1, 0));
  float topSnowball = sdSphere(p, 0.75, vec3(0, 0.5, 0));

  return opSmoothUnion(bottomSnowball, topSnowball, 0.2);
}

float sdEye(vec3 p) {
  return sdSphere(p, .1, vec3(-0.2, 0.6, 0.7));
}

float sdNose(vec3 p) {
  float noseAngle = radians(75.);
  return sdCone(p, vec2(sin(noseAngle), cos(noseAngle)), 0.5, vec3(0, 0.4, 1.2));
}

float sdArm(vec3 p) {
  float mainBranch = sdCapsule(p, vec3(0, 0.5, 0), vec3(0.8, 0, 0.), 0.05, vec3(-1.5, -0.5, 0));
  float smallBranchBottom = sdCapsule(p, vec3(0, 0.1, 0), vec3(0.5, 0, 0.), 0.05, vec3(-2, 0, 0));
  float smallBranchTop = sdCapsule(p, vec3(0, 0.3, 0), vec3(0.5, 0, 0.), 0.05, vec3(-2, 0, 0));

  float d = opUnion(mainBranch, smallBranchBottom);
  d = opUnion(d, smallBranchTop);
  return d;
}

float sdHat(vec3 p) {
  float hatBottom = sdCappedCylinder(p, 0.5, 0.05, vec3(0, 1.2, 0));
  float hatTop = sdCappedCylinder(p, 0.3, 0.3, vec3(0, 1.5, 0));

  return opUnion(hatBottom, hatTop);
}

float sdSnowman(vec3 p) {
  float body = sdBody(p);
  float leftEye = sdEye(p);
  float rightEye = sdEye(opFlipX(p));
  float nose = sdNose(p);
  float leftArm = sdArm(p);
  float rightArm = sdArm(opFlipX(p));
  float hat = sdHat(p);

  float d = body;
  d = opUnion(d, leftEye);
  d = opUnion(d, rightEye);
  d = opUnion(d, nose);
  d = opUnion(d, leftArm);
  d = opUnion(d, rightArm);
  d = opUnion(d, hat);
  return d;
}

float scene(vec3 p) {
 return sdSnowman(p);
}

float rayMarch(vec3 ro, vec3 rd) {
  float depth = MIN_DIST;
  float d; // distance ray has travelled

  for (int i = 0; i < MAX_MARCHING_STEPS; i++) {
    vec3 p = ro + depth * rd;
    d = scene(p);
    depth += d;
    if (d < PRECISION || depth > MAX_DIST) break;
  }

  d = depth;

  return d;
}

vec3 calcNormal(in vec3 p) {
    vec2 e = vec2(1, -1) * EPSILON;
    return normalize(
      e.xyy * scene(p + e.xyy) +
      e.yyx * scene(p + e.yyx) +
      e.yxy * scene(p + e.yxy) +
      e.xxx * scene(p + e.xxx));
}

mat3 camera(vec3 cameraPos, vec3 lookAtPoint) {
    vec3 cd = normalize(lookAtPoint - cameraPos);
    vec3 cr = normalize(cross(vec3(0, 1, 0), cd));
    vec3 cu = normalize(cross(cd, cr));

    return mat3(-cr, cu, -cd);
}

void mainImage( out vec4 fragColor, in vec2 fragCoord )
{
  vec2 uv = (fragCoord-.5*iResolution.xy)/iResolution.y;
  vec2 mouseUV = iMouse.xy/iResolution.xy;

  if (mouseUV == vec2(0.0)) mouseUV = vec2(0.5); // trick to center mouse on page load

  vec3 col = vec3(0);
  vec3 lp = vec3(0); // lookat point
  vec3 ro = vec3(0, 0, 3); // ray origin that represents camera position

  float cameraRadius = 2.;
  ro.yz = ro.yz * cameraRadius * rotate2d(mix(-PI/2., PI/2., mouseUV.y));
  ro.xz = ro.xz * rotate2d(mix(-PI, PI, mouseUV.x)) + vec2(lp.x, lp.z);

  vec3 rd = camera(ro, lp) * normalize(vec3(uv, -1)); // ray direction

  float d = rayMarch(ro, rd); // signed distance value to closest object

  if (d > MAX_DIST) {
    col = COLOR_BACKGROUND; // ray didn't hit anything
  } else {
    vec3 p = ro + rd * d; // point discovered from ray marching
    vec3 normal = calcNormal(p); // surface normal

    vec3 lightPosition = vec3(0, 2, 2);
    vec3 lightDirection = normalize(lightPosition - p) * .65; // The 0.65 is used to decrease the light intensity a bit

    float dif = clamp(dot(normal, lightDirection), 0., 1.) * 0.5 + 0.5; // diffuse reflection mapped to values between 0.5 and 1.0

    col = vec3(dif) + COLOR_AMBIENT;
  }

  fragColor = vec4(col, 1.0);
}
Coloring the Snowman
Now that we have the model of snowman built, let's add some color! We can declare some constants at the top of our code. We already have constants declared for the background color and ambient color in our scene. Let's add colors for each part of the snowman.
const vec3 COLOR_BACKGROUND = vec3(.741, .675, .82);
const vec3 COLOR_AMBIENT = vec3(0.42, 0.20, 0.1);
const vec3 COLOR_BODY = vec3(1);
const vec3 COLOR_EYE = vec3(0);
const vec3 COLOR_NOSE = vec3(0.8, 0.3, 0.1);
const vec3 COLOR_ARM = vec3(0.2);
const vec3 COLOR_HAT = vec3(0);
Take note that the final color of the snowman is currently determined by Lambertian diffuse reflection plus the ambient color. Therefore, the color we defined in our constants will be blended with the ambient color. If you prefer, you can remove the ambient color to see the true color of each part of the snowman.
float dif = clamp(dot(normal, lightDirection), 0., 1.) * 0.5 + 0.5;
col = vec3(dif) + COLOR_AMBIENT;
As we learned in Part 7 of my Shadertoy tutorial series, we can use structs to hold multiple values. We'll create a new struct that will hold the "signed distance" from the camera to the surface of an object in our scene and the color of that surface.
struct Surface {
  float sd; // signed distance
  vec3 col; // diffuse color
};
We'll have to make changes to a few operations, so they return Surface structs instead of just float values.
For the opUnion operation, we will actually overload this function. We'll keep the original function intact, but create a new opUnion function that passes in Surface structs instead of floats.
float opUnion(float d1, float d2) {
  return min(d1, d2);
}

Surface opUnion(Surface d1, Surface d2) {
  if (d2.sd < d1.sd) return d2;
  return d1;
}
Function overloading is quite common across different programming languages. It lets us define the same function name, but we can pass in a different number of parameters or different types of parameters. Therefore, if we call opUnion with float values, then it'll call the first function definition. If we call opUnion with Surface structs, then it'll call the second definition.
For the opSmoothUnion function, we won't need to overload this function. We will change this function to accept Surface structs instead of float values. Therefore, we need to call mix on both the signed distance, sd, and the color, col. This lets us smoothly blend two shapes together and blend their colors together as well.
Surface opSmoothUnion( Surface d1, Surface d2, float k ) {
  Surface s;
  float h = clamp( 0.5 + 0.5*(d2.sd-d1.sd)/k, 0.0, 1.0 );
  s.sd = mix( d2.sd, d1.sd, h ) - k*h*(1.0-h);
  s.col = mix( d2.col, d1.col, h ) - k*h*(1.0-h);

  return s;
}
We'll leave the SDFs for the primitive shapes (sphere, cone, capsule, cylinder) alone. They will continue to return a float value. However, we'll need to adjust our custom SDFs that return a part of the snowman. We want to return a Surface struct that contains a color for each part of our snowman, so we can pass along the color value during our ray marching loop.
Surface sdBody(vec3 p) {
  Surface bottomSnowball = Surface(sdSphere(p, 1., vec3(0, -1, 0)), COLOR_BODY);
  Surface topSnowball = Surface(sdSphere(p, 0.75, vec3(0, 0.5, 0)), COLOR_BODY);

  return opSmoothUnion(bottomSnowball, topSnowball, 0.2);
}

Surface sdEye(vec3 p) {
  float d = sdSphere(p, .1, vec3(-0.2, 0.6, 0.7));
  return Surface(d, COLOR_EYE);
}

Surface sdNose(vec3 p) {
  float noseAngle = radians(75.);
  float d = sdCone(p, vec2(sin(noseAngle), cos(noseAngle)), 0.5, vec3(0, 0.4, 1.2));
  return Surface(d, COLOR_NOSE);
}

Surface sdArm(vec3 p) {
  float mainBranch = sdCapsule(p, vec3(0, 0.5, 0), vec3(0.8, 0, 0.), 0.05, vec3(-1.5, -0.5, 0));
  float smallBranchBottom = sdCapsule(p, vec3(0, 0.1, 0), vec3(0.5, 0, 0.), 0.05, vec3(-2, 0, 0));
  float smallBranchTop = sdCapsule(p, vec3(0, 0.3, 0), vec3(0.5, 0, 0.), 0.05, vec3(-2, 0, 0));

  float d = opUnion(mainBranch, smallBranchBottom);
  d = opUnion(d, smallBranchTop);
  return Surface(d, COLOR_ARM);
}

Surface sdHat(vec3 p) {
  Surface bottom = Surface(sdCappedCylinder(p, 0.5, 0.05, vec3(0, 1.2, 0)), COLOR_HAT);
  Surface top = Surface(sdCappedCylinder(p, 0.3, 0.3, vec3(0, 1.5, 0)), COLOR_HAT);

  return opUnion(bottom, top);
}

Surface sdSnowman(vec3 p) {
  Surface body = sdBody(p);
  Surface leftEye = sdEye(p);
  Surface rightEye = sdEye(opFlipX(p));
  Surface nose = sdNose(p);
  Surface leftArm = sdArm(p);
  Surface rightArm = sdArm(opFlipX(p));
  Surface hat = sdHat(p);

  Surface co = body;
  co = opUnion(co, leftEye);
  co = opUnion(co, rightEye);
  co = opUnion(co, nose);
  co = opUnion(co, hat);
  co = opUnion(co, leftArm);
  co = opUnion(co, rightArm);

  return co;
}

Surface scene(vec3 p) {
  return sdSnowman(p);
}
Our ray marching loop will need adjusted, since we are now returning a Surface struct instead of a float value.
Surface rayMarch(vec3 ro, vec3 rd) {
  float depth = MIN_DIST;
  Surface co; // closest object

  for (int i = 0; i < MAX_MARCHING_STEPS; i++) {
    vec3 p = ro + depth * rd;
    co = scene(p);
    depth += co.sd;
    if (co.sd < PRECISION || depth > MAX_DIST) break;
  }

  co.sd = depth;

  return co;
}
We also need to adjust the calcNormal function to use the signed distance value, sd.
vec3 calcNormal(in vec3 p) {
    vec2 e = vec2(1, -1) * EPSILON;
    return normalize(
      e.xyy * scene(p + e.xyy).sd +
      e.yyx * scene(p + e.yyx).sd +
      e.yxy * scene(p + e.yxy).sd +
      e.xxx * scene(p + e.xxx).sd);
}
In the mainImage function, the ray marching loop used to return a float.
float d = rayMarch(ro, rd);
We need to replace the above code with the following, since the ray marching loop now returns a Surface struct.
Surface co = rayMarch(ro, rd);
Additionally, we need to check if co.sd is greater than MAX_DIST instead of d:
if (co.sd > MAX_DIST)
Likewise, we need to use co instead of d when defining p:
vec3 p = ro + rd * co.sd;
In the mainImage function, we were setting the color equal to the diffuse color plus the ambient color.
col = vec3(dif) + COLOR_AMBIENT;
Now, we need to replace the above line with the following, since the color is determined by the part of the snowman hit by the ray as well.
col = dif * co.col + COLOR_AMBIENT;
Your finished code should look like the following:
const int MAX_MARCHING_STEPS = 255;
const float MIN_DIST = 0.0;
const float MAX_DIST = 100.0;
const float PRECISION = 0.001;
const float EPSILON = 0.0005;
const float PI = 3.14159265359;
const vec3 COLOR_BACKGROUND = vec3(.741, .675, .82);
const vec3 COLOR_AMBIENT = vec3(0.42, 0.20, 0.1);
const vec3 COLOR_BODY = vec3(1);
const vec3 COLOR_EYE = vec3(0);
const vec3 COLOR_NOSE = vec3(0.8, 0.3, 0.1);
const vec3 COLOR_ARM = vec3(0.2);
const vec3 COLOR_HAT = vec3(0);

struct Surface {
  float sd; // signed distance
  vec3 col; // diffuse color
};

mat2 rotate2d(float theta) {
  float s = sin(theta), c = cos(theta);
  return mat2(c, -s, s, c);
}

float opUnion(float d1, float d2) {
  return min(d1, d2);
}

Surface opUnion(Surface d1, Surface d2) {
  if (d2.sd < d1.sd) return d2;
  return d1;
}

Surface opSmoothUnion( Surface d1, Surface d2, float k ) {
  Surface s;
  float h = clamp( 0.5 + 0.5*(d2.sd-d1.sd)/k, 0.0, 1.0 );
  s.sd = mix( d2.sd, d1.sd, h ) - k*h*(1.0-h);
  s.col = mix( d2.col, d1.col, h ) - k*h*(1.0-h);

  return s;
}

vec3 opFlipX(vec3 p) {
  p.x *= -1.;
  return p;
}

float sdSphere(vec3 p, float r, vec3 offset)
{
  return length(p - offset) - r;
}

float sdCone( vec3 p, vec2 c, float h, vec3 offset )
{
  p -= offset;
  float q = length(p.xy);
  return max(dot(c.xy,vec2(q,p.z)),-h-p.z);
}

float sdCapsule( vec3 p, vec3 a, vec3 b, float r, vec3 offset )
{
  p -= offset;
  vec3 pa = p - a, ba = b - a;
  float h = clamp( dot(pa,ba)/dot(ba,ba), 0.0, 1.0 );
  return length( pa - ba*h ) - r;
}

float sdCappedCylinder(vec3 p, float h, float r, vec3 offset)
{
  p -= offset;
  vec2 d = abs(vec2(length(p.xz),p.y)) - vec2(h,r);
  return min(max(d.x,d.y),0.0) + length(max(d,0.0));
}

Surface sdBody(vec3 p) {
  Surface bottomSnowball = Surface(sdSphere(p, 1., vec3(0, -1, 0)), COLOR_BODY);
  Surface topSnowball = Surface(sdSphere(p, 0.75, vec3(0, 0.5, 0)), COLOR_BODY);

  return opSmoothUnion(bottomSnowball, topSnowball, 0.2);
}

Surface sdEye(vec3 p) {
  float d = sdSphere(p, .1, vec3(-0.2, 0.6, 0.7));
  return Surface(d, COLOR_EYE);
}

Surface sdNose(vec3 p) {
  float noseAngle = radians(75.);
  float d = sdCone(p, vec2(sin(noseAngle), cos(noseAngle)), 0.5, vec3(0, 0.4, 1.2));
  return Surface(d, COLOR_NOSE);
}

Surface sdArm(vec3 p) {
  float mainBranch = sdCapsule(p, vec3(0, 0.5, 0), vec3(0.8, 0, 0.), 0.05, vec3(-1.5, -0.5, 0));
  float smallBranchBottom = sdCapsule(p, vec3(0, 0.1, 0), vec3(0.5, 0, 0.), 0.05, vec3(-2, 0, 0));
  float smallBranchTop = sdCapsule(p, vec3(0, 0.3, 0), vec3(0.5, 0, 0.), 0.05, vec3(-2, 0, 0));

  float d = opUnion(mainBranch, smallBranchBottom);
  d = opUnion(d, smallBranchTop);
  return Surface(d, COLOR_ARM);
}

Surface sdHat(vec3 p) {
  Surface bottom = Surface(sdCappedCylinder(p, 0.5, 0.05, vec3(0, 1.2, 0)), COLOR_HAT);
  Surface top = Surface(sdCappedCylinder(p, 0.3, 0.3, vec3(0, 1.5, 0)), COLOR_HAT);

  return opUnion(bottom, top);
}

Surface sdSnowman(vec3 p) {
  Surface body = sdBody(p);
  Surface leftEye = sdEye(p);
  Surface rightEye = sdEye(opFlipX(p));
  Surface nose = sdNose(p);
  Surface leftArm = sdArm(p);
  Surface rightArm = sdArm(opFlipX(p));
  Surface hat = sdHat(p);

  Surface co = body;
  co = opUnion(co, leftEye);
  co = opUnion(co, rightEye);
  co = opUnion(co, nose);
  co = opUnion(co, hat);
  co = opUnion(co, leftArm);
  co = opUnion(co, rightArm);

  return co;
}

Surface scene(vec3 p) {
  return sdSnowman(p);
}

Surface rayMarch(vec3 ro, vec3 rd) {
  float depth = MIN_DIST;
  Surface co; // closest object

  for (int i = 0; i < MAX_MARCHING_STEPS; i++) {
    vec3 p = ro + depth * rd;
    co = scene(p);
    depth += co.sd;
    if (co.sd < PRECISION || depth > MAX_DIST) break;
  }

  co.sd = depth;

  return co;
}

vec3 calcNormal(in vec3 p) {
    vec2 e = vec2(1, -1) * EPSILON;
    return normalize(
      e.xyy * scene(p + e.xyy).sd +
      e.yyx * scene(p + e.yyx).sd +
      e.yxy * scene(p + e.yxy).sd +
      e.xxx * scene(p + e.xxx).sd);
}

mat3 camera(vec3 cameraPos, vec3 lookAtPoint) {
    vec3 cd = normalize(lookAtPoint - cameraPos);
    vec3 cr = normalize(cross(vec3(0, 1, 0), cd));
    vec3 cu = normalize(cross(cd, cr));

    return mat3(-cr, cu, -cd);
}

void mainImage( out vec4 fragColor, in vec2 fragCoord )
{
  vec2 uv = (fragCoord-.5*iResolution.xy)/iResolution.y;
  vec2 mouseUV = iMouse.xy/iResolution.xy;

  if (mouseUV == vec2(0.0)) mouseUV = vec2(0.5); // trick to center mouse on page load

  vec3 col = vec3(0);
  vec3 lp = vec3(0); // lookat point
  vec3 ro = vec3(0, 0, 3); // ray origin that represents camera position

  float cameraRadius = 2.;
  ro.yz = ro.yz * cameraRadius * rotate2d(mix(-PI/2., PI/2., mouseUV.y));
  ro.xz = ro.xz * rotate2d(mix(-PI, PI, mouseUV.x)) + vec2(lp.x, lp.z);

  vec3 rd = camera(ro, lp) * normalize(vec3(uv, -1)); // ray direction

  Surface co = rayMarch(ro, rd); // closest object

  if (co.sd > MAX_DIST) {
    col = COLOR_BACKGROUND; // ray didn't hit anything
  } else {
    vec3 p = ro + rd * co.sd; // point discovered from ray marching
    vec3 normal = calcNormal(p); // surface normal

    vec3 lightPosition = vec3(0, 2, 2);
    vec3 lightDirection = normalize(lightPosition - p) * .65; // The 0.65 is used to decrease the light intensity a bit

    float dif = clamp(dot(normal, lightDirection), 0., 1.) * 0.5 + 0.5; // diffuse reflection mapped to values between 0.5 and 1.0

    col = dif * co.col + COLOR_AMBIENT;
  }

  fragColor = vec4(col, 1.0);
}
When you run this code, you should see the snowman in color!
Creating Multiple Snowmen
Now that we have added color to our snowman, let's create an awesome scene using our new snowman model!
The snowman model is currently floating in air. Let's add a floor of now beneath the snowman. We'll create a new custom SDF that returns a Surface struct.
Surface sdFloor(vec3 p) {
  float snowFloor = p.y + 2.;
  vec3 snowFloorCol = vec3(1);
  return Surface(snowFloor, snowFloorCol);
}
Then, we'll adjust our scene function to add the floor to our 3D scene.
Surface scene(vec3 p) {
  return opUnion(sdSnowman(p), sdFloor(p));
}
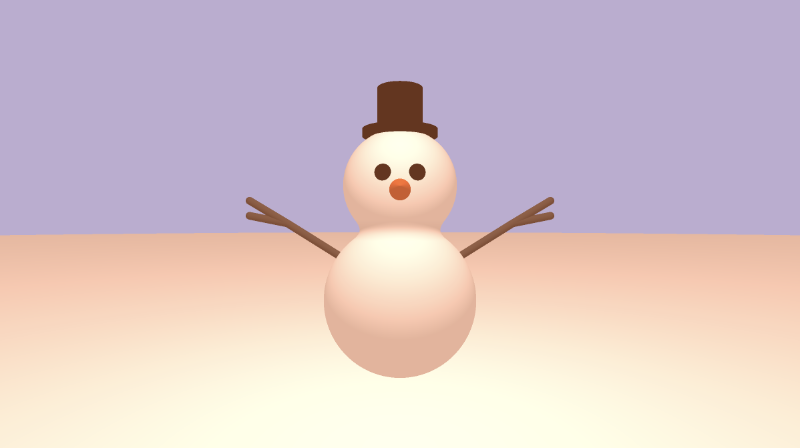
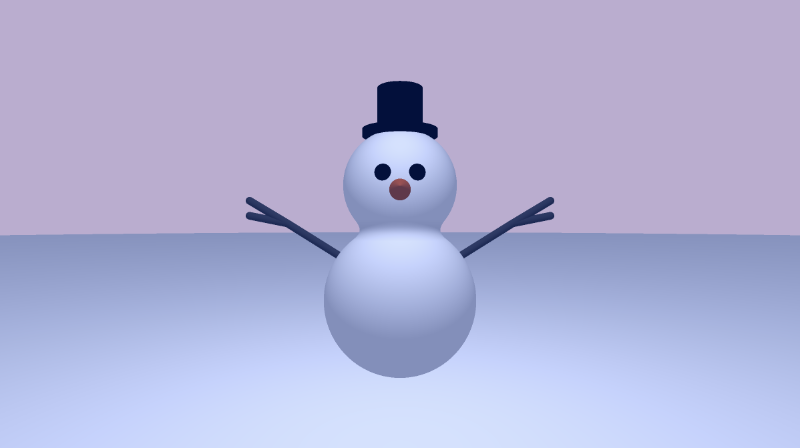
The colors we have chosen makes it look like it's a sunny day outside. What if we wanted to make it look like it was nighttime instead? We can adjust the ambient light color to change the mood of the scene.
const vec3 COLOR_AMBIENT = vec3(0.0, 0.20, 0.8) * 0.3;
Now the scene instantly appears different.
The surface of the snow appears a bit flat. What if we wanted to add a bit of texture to it? We can use "channels" in Shadertoy to add a texture to our shader. Underneath the code section on Shadertoy, you should see four channels: iChannel0, iChannel1, iChannel2, and iChannel3.
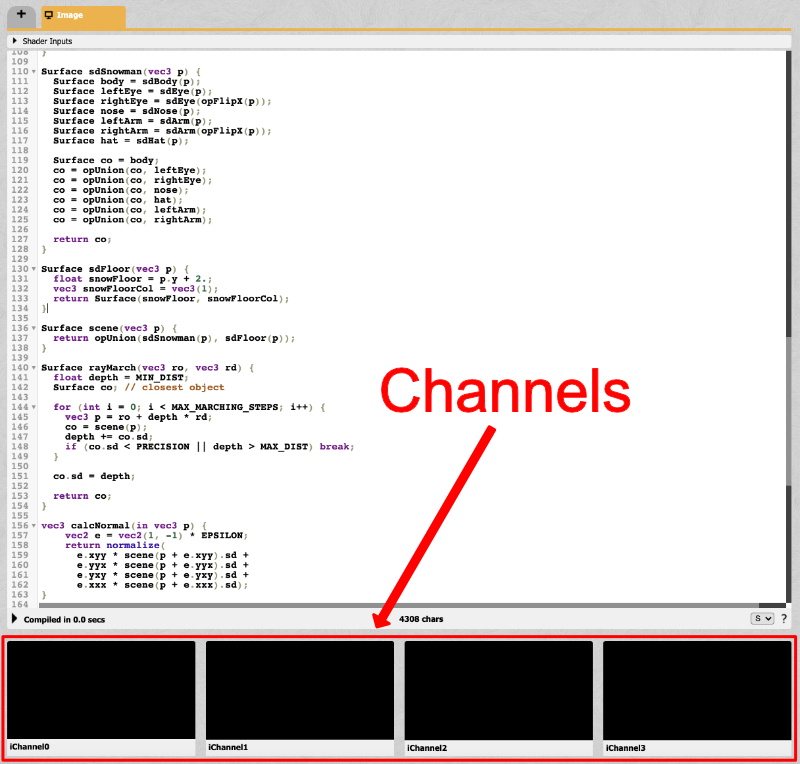
You can use channels to add interactivity to your shader such as a webcam, microphone input, or even sound from SoundCloud! In our case, we want to add a texture. Click on the box for iChannel0. You should see a modal pop up. Click on the "Textures" tab, and you should see a selection of textures to choose from.
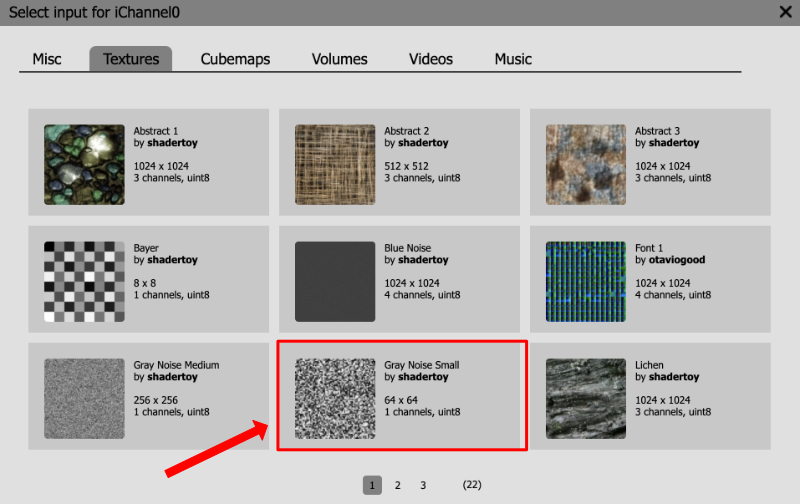
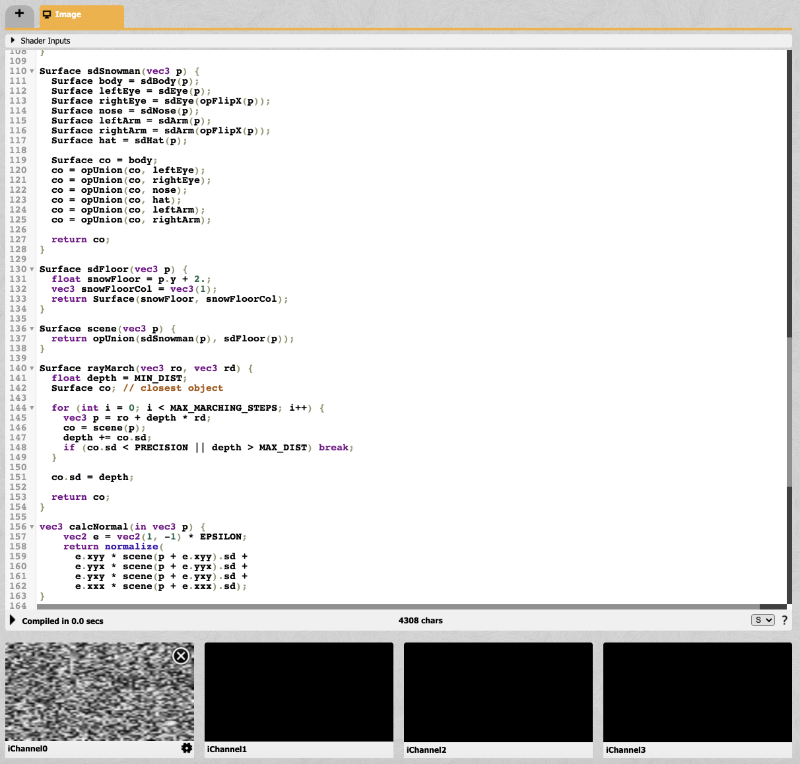
Select the texture called "Gray Noise Small." Once selected, it should appear in the iChannel0 box beneath your code.
Noise lets us add a bit of fake randomness or "pseudorandomness" to our code. It's not truly random because the shader will look the same upon every run. This makes the shader deterministic, which is useful for making sure everyone sees the same shader. Noise will make it seem like the floor has a "random" pattern. We don't have access to anything like Math.random in GLSL code like we do in JavaScript. Therefore, shader authors typically have to rely on procedurally generating noise through an algorithm or by utilizing textures from images like what we're going to do.
Go back to the sdFloor function we defined earlier and replace it with the following code.
Surface sdFloor(vec3 p) {
  float snowFloor = p.y + 2. + texture(iChannel0, p.xz).x * 0.01;
  vec3 snowFloorCol = 0.85 * mix(vec3(1.5), vec3(1), texture(iChannel0, p.xz/100.).x);
  return Surface(snowFloor, snowFloorCol);
}
The texture function lets us access the texture stored in iChannel0. Each texture has a set of UV coordinates much like the Shadertoy canvas. The first parameter of the texture function will be iChannel0. The second parameter is the point on the "Gray Noise Small" image we would like to select.
We can adjust the height of the floor by sampling values from the texture.
float snowFloor = p.y + 2. + texture(iChannel0, p.xz).x * 0.01;
We can also adjust the color of the floor by sampling values from the texture.
vec3 snowFloorCol = 0.85 * mix(vec3(1.5), vec3(1), texture(iChannel0, p.xz/100.).x);
I played around with scaling factors and values in the mix function until I found a material that looked close enough to snow.
The snowman looks a bit lonely, so why not give him some friends! We can use the opRep operation I discussed in Part 14 of my Shadertoy tutorial series to create lots of snowmen!
Surface opRep(vec3 p, vec3 c)
{
  vec3 q = mod(p+0.5*c,c)-0.5*c;
  return sdSnowman(q);
}
In the scene function, we can set the spacing between the snowmen and set the directions the snowmen should repeat.
Surface scene(vec3 p) {
  Surface sdSnowmen = opRep(p - vec3(0, 0, -2), vec3(5, 0, 5));

  return opUnion(sdSnowmen, sdFloor(p));
}
The snowman is no longer alone! However, one snowman seems to be hogging all the attention in the scene.
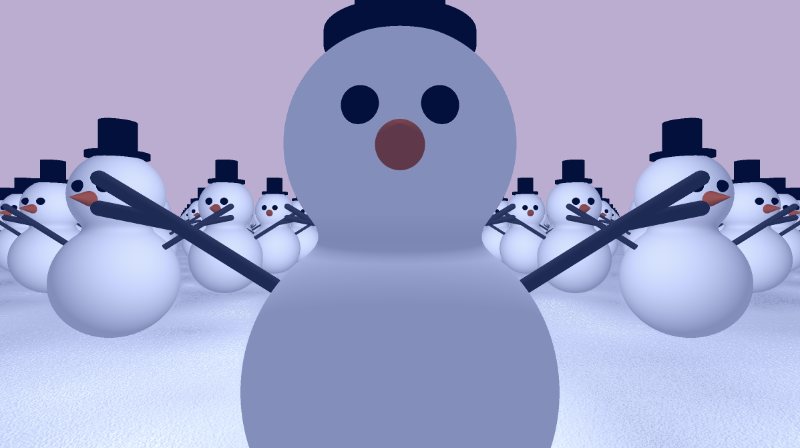
Let's make a few adjustments. We'll change the default position of the mouse when the page loads, so it's slightly offset from the center of the screen.
if (mouseUV == vec2(0.0)) mouseUV = vec2(0.5, 0.4);
Next, we'll adjust the lookat point:
vec3 lp = vec3(0, 0, -2);
Finally, we'll adjust the starting angle and position of the scene when the page loads:
Surface scene(vec3 p) {
  p.x -= 0.75; // move entire scene slightly to the left
  p.xz *= rotate2d(0.5); // start scene at an angle

  Surface sdSnowmen = opRep(p - vec3(0, 0, -2), vec3(5, 0, 5));

  return opUnion(sdSnowmen, sdFloor(p));
}
Now, the scene is setup such that people visiting your shader for the first time will see a bunch of snowmen without one of the snowman getting in the way of the camera. You can still use your mouse to rotate the camera around the scene.
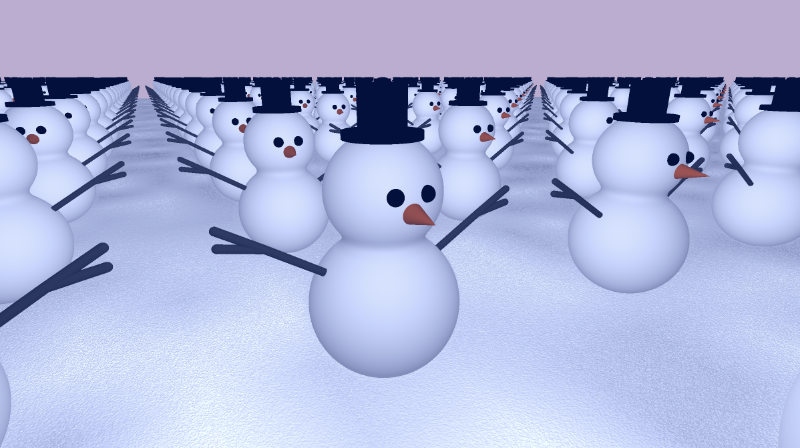
The scene is starting to look better, but as you look down the isle of snowmen, it looks too artificial. Let's add some fog to add a sense of depth to our scene. We learned about fog in Part 13 of my Shadertoy series. Right before the final fragColor value is set, add the following line:
col = mix(col, COLOR_BACKGROUND, 1.0 - exp(-0.00005 * co.sd * co.sd * co.sd)); // fog
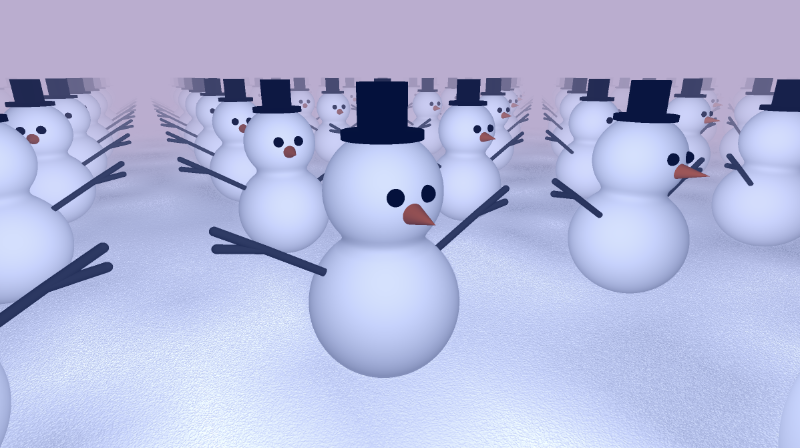
Much better! The snowmen seem to be facing away from the light. Let's change the light direction, so they appear brighter. Inside the mainImage function, we'll adjust the value of the light position.
vec3 lightPosition = vec3(0, 2, 0);
We'll also make the color of each snowman's body and hat a bit brighter.
const vec3 COLOR_BODY = vec3(1.15);
const vec3 COLOR_HAT = vec3(0.4);
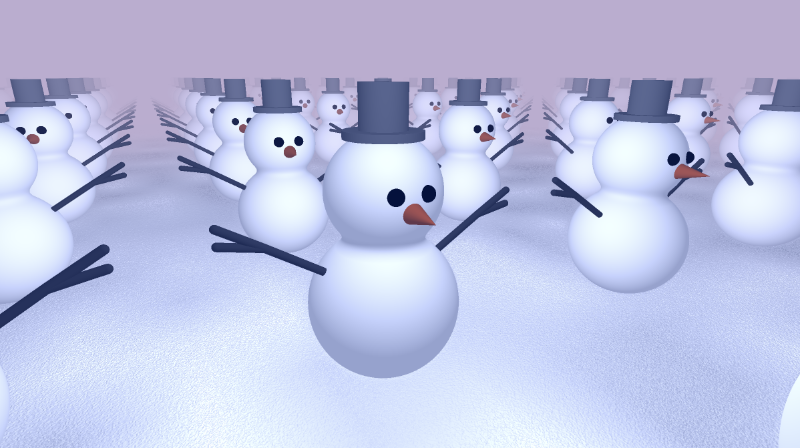
Their hats look more noticeable now! Next, let's make the snowmen a bit more lively. We'll wiggle them a bit and have them bounce up and down.
We can cause them to wiggle a bit by applying a transformation matrix to each snowman. Create a function called wiggle and use the rotateZ function I discussed in Part 8.
mat3 rotateZ(float theta) {
  float c = cos(theta);
  float s = sin(theta);
  return mat3(
    vec3(c, -s, 0),
    vec3(s, c, 0),
    vec3(0, 0, 1)
  );
}

mat3 wiggle() {
  return rotateZ(mix(-0.01, 0.01, cos(iTime * SPEED)));
}
We'll define a SPEED constant at the top of our code. Let's set it to a value of four.
const float SPEED = 4.;
Then, we'll apply the wiggle function inside the opRep function, so it's applied to each snowman.
Surface opRep(vec3 p, vec3 c)
{
  vec3 q = mod(p+0.5*c,c)-0.5*c;
  return sdSnowman(q * wiggle());
}
Next, we want the snowmen to bounce up and down a bit. We can add the following line to our scene function.
p.y *= mix(1., 1.03, sin(iTime * SPEED));
This will deform the snowmen about the y-axis by a tiny amount. We use the mix function to remap the value of the sin function to values between 1.0 and 1.03.
Your scene function should now look like the following.
Surface scene(vec3 p) {
  p.x -= 0.75; // move entire scene slightly to the left
  p.xz *= rotate2d(0.5); // start scene at an angle
  p.y *= mix(1., 1.03, sin(iTime * SPEED)); // bounce snowman up and down a bit

  Surface sdSnowmen = opRep(p - vec3(0, 0, -2), vec3(5, 0, 5));

  return opUnion(sdSnowmen, sdFloor(p));
}
When you run the code, you should see the snowmen start wiggling!
Finally, we can "let it snow" by overlaying falling snow on top of the scene. There are already plenty of great snow shaders out there on Shadertoy. We'll use "snow snow" by the Shadertoy author, changjiu. Always make sure you give credit to authors when using their shaders. If you're using an author's shader for commercial applications such as a game, make sure to ask their permission first!
Inside Shadertoy, we can use channels to add a buffer similar to how we added a texture earlier. Buffers let you create "multi-pass" shaders that let you pass the output or final color of each pixel of one shader to another shader. Think of it as a shader pipeline. We can pass the output of Buffer A to the main program running in the "Image" tab in your Shadertoy environment.
Click on the iChannel1 box in the section underneath your code. A popup should appear. Click on the "Misc" tab and select Buffer A.
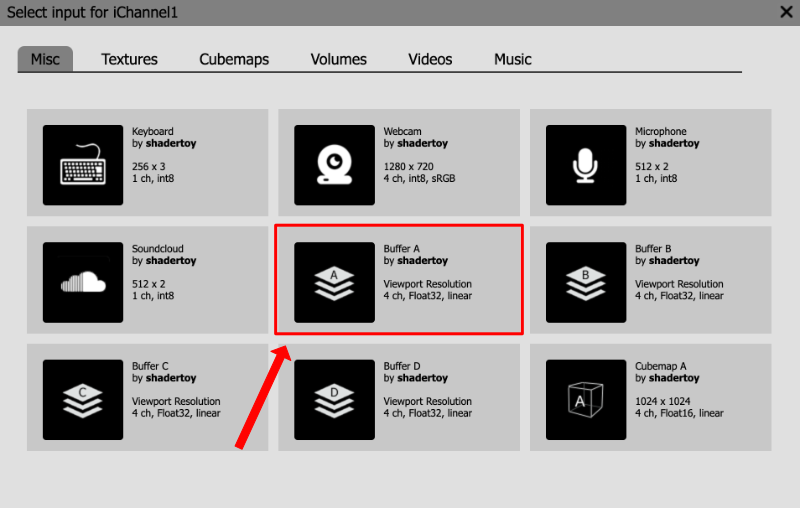
Once you add Buffer A, you should see it appear in the iChannel1 box.

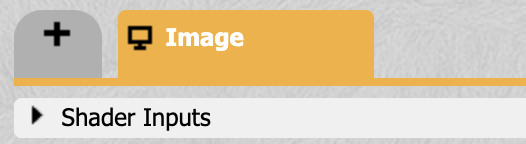
Next, we need to create the Buffer A shader. Then, we'll add code inside of this shader pass. At the top of your screen, you should see a tab that says "Image" above your code. To the left of that, you will find a tab with a plus sign (+). Click on the plus sign, and choose "Buffer A" in the dropdown that appears.
Inside Buffer A, add the following code:
/*
** Buffer A
** Credit: This buffer contains code forked from "snow snow" by changjiu: https://www.shadertoy.com/view/3ld3zX
*/

float SIZE_RATE = 0.1;
float XSPEED = 0.5;
float YSPEED = 0.75;
float LAYERS = 10.;

float Hash11(float p)
{
  vec3 p3 = fract(vec3(p) * 0.1);
  p3 += dot(p3, p3.yzx + 19.19);
  return fract((p3.x + p3.y) * p3.z);
}

vec2 Hash22(vec2 p)
{
  vec3 p3 = fract(vec3(p.xyx) * 0.3);
  p3 += dot(p3, p3.yzx+19.19);
  return fract((p3.xx+p3.yz)*p3.zy);
}

vec2 Rand22(vec2 co)
{
  float x = fract(sin(dot(co.xy ,vec2(122.9898,783.233))) * 43758.5453);
  float y = fract(sin(dot(co.xy ,vec2(457.6537,537.2793))) * 37573.5913);
  return vec2(x,y);
}

vec3 SnowSingleLayer(vec2 uv,float layer){
  vec3 acc = vec3(0.0,0.0,0.0);
  uv = uv * (2.0 + layer);
  float xOffset = uv.y * (((Hash11(layer)*2.-1.)*0.5+1.)*XSPEED);
  float yOffset = YSPEED * iTime;
  uv += vec2(xOffset,yOffset);
  vec2 rgrid = Hash22(floor(uv)+(31.1759*layer));
  uv = fract(uv) - (rgrid*2.-1.0) * 0.35 - 0.5;
  float r = length(uv);
  float circleSize = 0.04*(1.5+0.3*sin(iTime*SIZE_RATE));
  float val = smoothstep(circleSize,-circleSize,r);
  vec3 col = vec3(val,val,val)* rgrid.x ;
  return col;
}

void mainImage( out vec4 fragColor, in vec2 fragCoord )
{
  vec2 uv = (fragCoord-.5*iResolution.xy)/iResolution.y;

  vec3 acc = vec3(0,0,0);
  for (float i = 0.; i < LAYERS; i++) {
    acc += SnowSingleLayer(uv,i);
  }

  fragColor = vec4(acc,1.0);
}
Then, go back to the "Image" tab where our main shader code lives. At the bottom of our code, we're going to use Buffer A to add falling snow to our scene in front of all the snowmen. Right after the fog and before the final fragColor is set, add the following line:
col += texture(iChannel1, fragCoord/iResolution.xy).rgb;
We use the texture function to access iChannel1 that holds the Buffer A texture. The second parameter of the texture function will be normal UV coordinates that go from zero to one. This will let us access each pixel of the shader in Buffer A as if it were an image.
Once you run the code, you should see an amazing winter scene with wiggling snowmen and falling snow! Congratulations! You did it! 🎉🎉🎉
You can see the finished code by visiting my shader on Shadertoy. Don't forget! You can use one of the channels to add music to your shader by selecting SoundCloud and pasting a URL in the input field.
Conclusion
I hope you had fun building a snowman model, learning how to color it, and then drawing multiple snowmen to a beautiful scene with falling snow. You learned how to use ray marching to build a 3D model, add a textured floor to a 3D scene, add fog to give your scene a sense of depth, and use buffers to create a multi-pass shader!
If this helped you in any way or inspired you, please consider donating. Please check out the resources for the finished code for each part of this tutorial. Until next time, happy coding! Stay inspired!!!