ts-node Tutorial
Greetings, friends! Running scripts written in TypeScript inside a Node.js environment usually involves transpiling (or if you prefer, "compiling") our TypeScript files to a CommonJS syntax that Node.js supports and then running the compiled code. It sure would be nice if we could execute TypeScript scripts the same way as regular JavaScript using Node.js! Luckily, ts-node exists to help us out!
Executing TypeScript Files
Suppose we had a script named main.js with the following contents:
const greeting = 'Greetings, friends!'
console.log(greeting)
Assuming you have Node.js installed, we can execute this script by running:
node main.js
Alternatively, we can use the shorter version:
node main
We should see the following output in our terminal:
Greetings, friends!
Now, let's create a file that uses TypeScript called main.ts instead:
const greeting: string = 'Greetings, friends!';
console.log(greeting);
If we try running this script using Node.js, we can see an error right away because Node.js doesn't support TypeScript natively.
SyntaxError: Missing initializer in const declaration
Let's install ts-node globally, so we can execute scripts written in TypeScript from any directory on our computer. We'll also need to make sure to install the "typescript" package globally.
npm i typescript ts-node -g
Now, if we run the following command, the script will work!
ts-node main.ts
Alternatively, you can leave off the extension again:
ts-node main
We should see the following output in our terminal:
Greetings, friends!
You may notice that the execution time is a bit slower than running a normal JavaScript file. This is because the TypeScript compiler needs to first compile the script to JavaScript, perform type checking, and then execute the file. If you want to run the script a bit faster, you can skip type checking and use the --transpile-only flag in three different ways:
# First way:
ts-node main.ts --transpile-only

# Second way:
ts-node main.ts -T

# Third way:
ts-node-transpile-only main.ts
Why should we care about ts-node? If you are writing a script for your application, then it's nice to use TypeScript's type system to make a clean and less buggy script that other developers can use. It also helps onboard new developers, so they can understand your script faster. Maybe you want to make a utility script that generates new components in your React application, or a script that uploads assets to a remote server. There are infinite reasons why you would want to write a utility script, and people who enjoy and/or already know JavaScript like writing scripts using the Node.js runtime. With ts-node, people who enjoy using TypeScript can leverage the Node.js runtime in a very simple way.
If you want to execute a TypeScript file like a shell script, then you can use a special shebang ts-node understands. The shebang looks like this:
#!/usr/bin/env ts-node-script
Create a file called hello.ts with the following contents:
#!/usr/bin/env ts-node-script

console.log('Greetings, friends!')
Then, you can make this file executable:
chmod +x hello.ts
Now you can run the TypeScript file like a shell script!
./hello.ts
Pretty cool! 😎
Using the TypeScript REPL
If you simply type node in your terminal, then you'll realize right away that it opens up what is called a read-eval-print-loop (or REPL for short). The Node.js REPL allows you to freely execute JavaScript in a Node.js runtime, similar to the console in your browser.

You can open up a TypeScript REPL by typing ts-node in your terminal.

Within a TypeScript REPL, you can play around with TypeScript code and import code from other libraries. For example, suppose we had a file named fruits.ts with the following contents:
export const fruits: string[] = ['apple', 'orange', 'banana', 'mango', 'plum'];
We can open up the TypeScript REPL with ts-node and import this file:

Using ts-node/register
Sometimes, you may want to programmatically require ts-node and register the loader for future require statements. This is useful for importing ts-node inside the normal Node.js runtime, so you can still use Node.js like normal and use ts-node with testing libraries.
Let's look at an example of the programmatic approach of using ts-node. Suppose we still had our fruits.ts file with the following contents:
export const fruits: string[] = ['apple', 'orange', 'banana', 'mango', 'plum'];
We'll create a file called main.js (note the .js extension) with the following contents:
require('ts-node').register({
transpileOnly: true
// insert other options with a boolean flag here
})
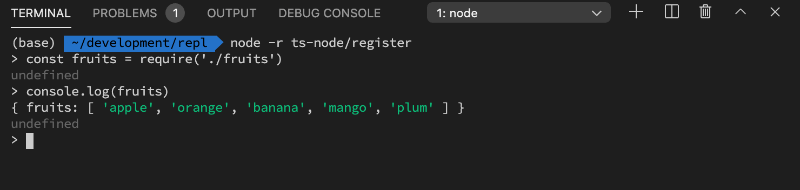
const fruits = require('./fruits')
console.log(fruits)
When you run node main in your terminal, you'll see the following output:
{ fruits: [ 'apple', 'orange', 'banana', 'mango', 'plum' ] }
How is this possible? The fruits.ts file is a TypeScript file, and the main.js file is a normal JavaScript file, so how did the require statement work? That's the power of registering the ts-node module. Once ran, ts-node will intercept other require statements and compile TypeScript files on the fly.
For more options you can use, please look at the ts-node documentation. The CLI options can be passed inside the register method as long as you use the camel case version of them. For example, --transpile-only would become transpileOnly: true.
The ts-node module also provides file shortcuts, so you can use the command line instead of relying on writing Node.js scripts. If you wanted to register ts-node programmatically through the CLI, you can run the following command:
node -r ts-node/register
The above command would be equivalent to the following:
require('ts-node').register()
The file shortcuts let you open up the Node.js REPL with ts-node automatically required. Now you have the ability to compile TypeScript files on the fly, so you can use require on TypeScript files.
Options are also available as file shortcuts:
node -r ts-node/register/transpile-only
The above command would be equivalent to the following:
require('ts-node').register({
  transpileOnly: true
})
What's the difference between using the ts-node CLI versus the Node.js CLI with ts-node/register? The ts-node CLI allows you to run TypeScript code in a REPL. If you tried running TypeScript code inside the normal Node.js REPL, you will get a syntax error. Use the ts-node CLI if you want to execute TypeScript files, debug TypeScript files, or experiment with TypeScript syntax. Use the Node.js CLI with ts-node/register if you want to run normal Node.js scripts such as a test runner like Mocha, but you want to let ts-node compile TypeScript code on the fly when you try to use require to import TypeScript files.
Conclusion
The ts-node package lets you play around with TypeScript in your terminal for debugging purposes and execute scripts written in TypeScript. If you want to play around with TypeScript without setting up ts-node, I suggest using the TypeScript Playground instead. I only gave a brief overview of ts-node in this article, but I hope you see how useful it is! If you would like to learn more about ts-node, please check out the documentation.