Using source-map-loader with TypeScript
Greetings, friends! TypeScript is all the rage these days. It makes our code cleaner, catches errors at compile-time instead of runtime, and helps prevent those nasty "Uncaught TypeError: blahblah is not a function" errors. When working with third party TypeScript libraries, I like getting IntelliSense inside VS Code, but sometimes, it'd be nice to view the original TypeScript source code while I'm debugging in Chrome dev tools. That's where the Source Map Loader comes in handy!
The source-map-loader is a very useful tool for extracting source maps from third party libraries you have installed such as those inside your node_modules directory. If the third party libraries don't contain source maps, then you'll have to find a different approach. Maybe the library contains both bundled .js files as well as the original .ts files? In that case, you can use Babel's TypeScript preset in conjunction with Webpack to create source maps for you. However, you won't always see the original TypeScript files in the node_modules directory. You'll likely find only JavaScript files and their corresponding declaration files, generated by the TypeScript compiler, tsc. You may have to look at a library author's GitHub page to see the original TypeScript code. For this reason, if you're building your own TypeScript library, it's important that you also include source maps.
For this tutorial, I have created a repo on GitHub. If you would like to follow along, please clone or download this repo:
git clone https://github.com/inspirnathan/source-map-loader-with-typescript-tutorial.git
There are two projects: "my-app" and "my-typescript-library." You only have to run npm install inside the my-app directory. The package.json file inside the my-typescript-library is only there to provide information to npm and the TypeScript compiler.
You should see the following folder structure:
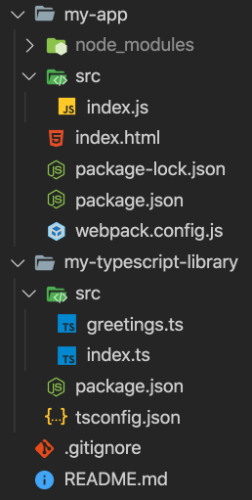
Let's examine the my-typescript-library folder first. Inside, there is a src directory that contains two files.
Inside my-typescript-library/src/greetings.ts, I'm exporting four ways to say "hello" in different languages.
export function sayHelloEnglish(): string {
  return 'Hello!';
}

export function sayHelloSpanish(): string {
  return 'Hola!';
}

export function sayHelloFrench(): string {
  return 'Bonjour!';
}

export function sayHelloPersian(): string {
  return 'Salaam!';
}
Inside my-typescript-library/src/index.ts, we are simply exporting each of these modules:
export {
  sayHelloEnglish,
  sayHelloSpanish,
  sayHelloFrench,
  sayHelloPersian,
} from './greetings';
We can transpile these TypeScript files down to JavaScript using the following command inside my-typescript-library:
npm run build
The above command will run the TypeScript compiler using the configuration found in tsconfig.json:
{
  "compilerOptions": {
    "module": "commonjs",
    "target": "es2015",
    "declaration": true,
    "outDir": "./dist",
    "sourceMap": true
  },
  "include": [
    "src/**/*"
  ]
}
When the build command is finished, we should see the following files inside the newly generated dist directory.
greetings.d.ts
greetings.js
greetings.js.map
index.d.ts
index.js
index.js.map
It's important to notice that we have generated source maps using the TypeScript compiler. These source maps will eventually be picked up by the source-map-loader we will use later. If you are using a third party library built in TypeScript, and they do not have a source map, then you won't be able to see source maps (that link back to the original TypeScript code) appear in your browser.
Now, let's look at the my-app folder and inspect the my-app/package.json file:
{
  "name": "my-app",
  "version": "1.0.0",
  "description": "",
  "main": "index.js",
  "scripts": {
    "start": "serve .",
    "build": "webpack"
  },
  "keywords": [],
  "author": "",
  "license": "ISC",
  "dependencies": {
    "my-typescript-library": "file:../my-typescript-library"
  },
  "devDependencies": {
    "serve": "^11.3.2",
    "source-map-loader": "^1.1.2",
    "webpack": "^5.4.0",
    "webpack-cli": "^4.2.0"
  }
}
Notice that we're installing my-typescript-library from the folder itself. This is a neat little trick to install packages you've developed locally without having to use npm link. However, I would suggest you use "npm link" when working on a professional project or developing a command-line tool as it can prove more useful, but it's okay to avoid it in this tutorial.
Alright. Let's build and start the application. While inside the my-app directory, run the following command:
npm run build && npm start
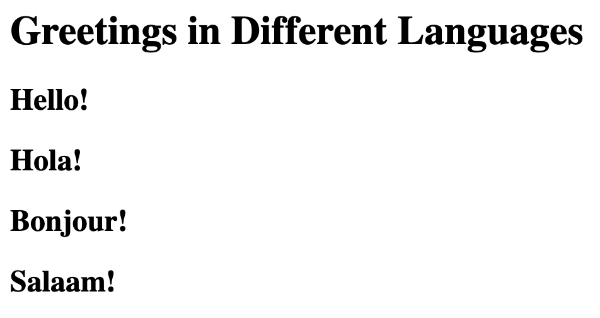
This will build the application using Webpack followed by starting a small server that serves up the index.html page.
Let's look at the my-app/index.html source code:
<!DOCTYPE html>
<html lang="en">
<head>
  <meta charset="UTF-8">
  <meta name="viewport" content="width=device-width, initial-scale=1.0">
  <title>My App</title>
</head>
<body>
  <h1>Greetings in Different Languages</h1>
  <div id="root"></div>
  <script src="./dist/main.js"></script>
</body>
</html>
We are injecting code inside the root element using a script from my-app/dist/main.js. This file is the compiled Webpack bundle, so let's look at the webpack.config.js file to figure out where the entry point is.
module.exports = {
  mode: 'development',
  devtool: 'source-map',
  entry: './src/index.js',
  module: {
    rules: [
      {
        test: /\.js$/,
        enforce: 'pre',
        use: ['source-map-loader'],
      },
    ],
  },
}
Inside this Webpack config, you can see that the entry file is my-app/src/index.js. That is the file that is injecting HTML inside the root element we saw in index.html. Notice that I have configured the source-map-loader for you. This is a Webpack loader that can grab all the source maps inside your project as well as those inside the node_modules directory. The pre option in the enforce field means that this loader should execute before all other loaders (though the order is a bit more complex than that as seen in Webpack's documentation).
With the power of source maps combined, let's see the source-map-loader in action! Open up Chrome Developer Tools and go to the "Sources" tab. Then, you can see the original TypeScript files found in my-typescript-library.
Pretty cool! We can inspect the original TypeScript source code of files found inside our node_modules directory. We can also insert breakpoints inside the my-app/src/index.js file, which is the file responsible for injecting HTML into the page:
import * as greetings from 'my-typescript-library';

const root = document.getElementById('root');

root.innerHTML = `
  <h2>${greetings.sayHelloEnglish()}</h2>
  <h2>${greetings.sayHelloSpanish()}</h2>
  <h2>${greetings.sayHelloFrench()}</h2>
  <h2>${greetings.sayHelloPersian()}</h2>`;
The source-map-loader works on all types of files that contain a sourceMappingURL, not just TypeScript and JavaScript files. As long as a package provides a source map, then Webpack can scoop it up with the source-map-loader.
Conclusion
Source maps are very important for debugging purposes. With all the transformations that happen in the JavaScript world, it's crucial to have the ability to see original source code of a library. Although it's entirely possible to navigate to the library author's GitHub page to inspect the source code, it's more convenient to troubleshoot code on the fly in the browser's developer tools. It's faster and easier to understand the issues that may exist as we're developing our application. If you have source maps visible in production applications, then you can see if third party code is causing any bugs or issues. This is the power of source maps. 😎