Taking Screenshots and Video on Your Mac
Greetings, friends! I hope you are staying safe out there! The whole world is getting hit by COVID-19, but as long as we work together, we can pull through just like humanity has before!
Most software developers these days are working from home, but it comes with some disadvantages. Communication may become distorted and lead to a lack of clarity on what a task entails. This could cause arguments, trouble picturing how to implement a feature or resolving an issue, and well, negative emotions we don't like feeling! 😔
It's important to share pictures and videos with coworkers frequently to truly understand the task at hand. Communication is very important and what better way than visuals. It's true what they say: "A picture is worth a 1000 words!" Does that mean a 60 second video playing at 30 frames per second is worth 1000 x 60 x 30 = 1800000 words? 🤔 Maybe!
If you have a device running MacOS, you have the ability to quickly create a screenshot using the following command:
Command + Shift + 3
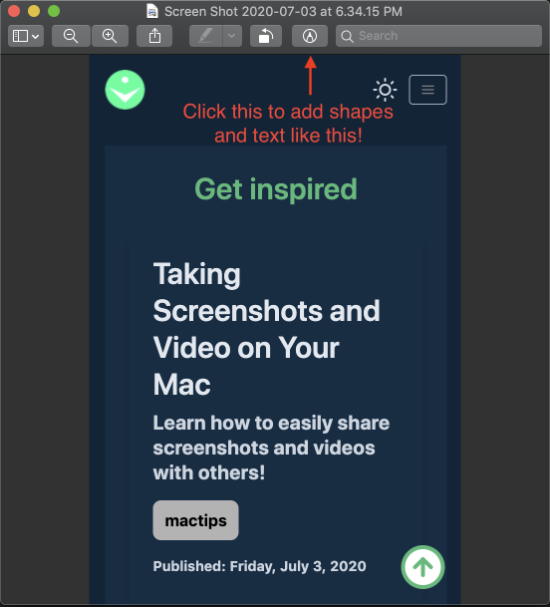
Yes, try it out! This takes a picture of your whole screen! By default, this screenshot will be saved to your Desktop directory on your computer. If the program, Preview, is set as your default program still, you can easily add markings to the picture to get someone's attention or to label something.
Now, sometimes, you don't want to take a screenshot of the whole screen. It'll not only have a greater file size, but you'll end up having a picture with too much information. Instead, it would be better to take a picture of only part of your screen. You can can do this with the following command:
Command + Shift + 4
Now, you can drag the cursor to take a screenshot of the portion of your screen that matters. You can proceed to edit the photo just like the previous keyboard shortcut.
Sometimes, sharing an image isn't enough and you need to show coworkers how to reproduce a bug. You can do this with a new keyboard shortcut added in Mojave or later versions of MacOS:
Command + Shift + 5
This will allow you to drag your cursor around like the previous shortcut, but now you can record a whole video! You can use the cursor to crop the screen to record only the portion of the screen that matters. In the popup that appears, make sure you select the Record Selected Portion icon.

To stop the video, you can press Command+Shift+5 again to open the popup again and then hit the Stop Screen Recording button. Or, you can click on this icon that appears at the top of your computer screen in the toolbar.

Sharing screenshots and videos is great way to be more collaborative with your team! Please share this knowledge with all of your peers. You don't have to be a developer to make use of these awesome tools Apple provides. For more keyboard shortcuts, see the official Apple support page.